Never Ending Security

It starts all here

Tag Archives: Ubuntu

HTTP Strict Transport Security for Apache, NGINX and Lighttpd


HTTP Strict Transport Security (often abbreviated as HSTS) is a security feature that lets a web site tell browsers that it should only be communicated with using HTTPS, instead of using HTTP. This tutorial will show you how to set up HSTS in Apache2, NGINX and Lighttpd. It is tested with all mentioned webservers, NGINX 1.1.19, Lighttpd 1.4.28 and Apache 2.2.22 on Ubuntu 12.04, Debian 6 & 7 and CentOS 6.It should work on other distro’s however, these are just reference values.

What is HTTP Strict Transport Security?

Quoting the Mozilla Developer Network:

If a web site accepts a connection through HTTP and redirects to HTTPS, the user in this case may initially talk to the non-encrypted version of the site before being redirected, if, for example, the user types http://www.foo.com/ or even just foo.com.

This opens up the potential for a man-in-the-middle attack, where the redirect could be exploited to direct a user to a malicious site instead of the secure version of the original page.

The HTTP Strict Transport Security feature lets a web site inform the browser that it should never load the site using HTTP, and should automatically convert all attempts to access the site using HTTP to HTTPS requests instead.

An example scenario:

You log into a free WiFi access point at an airport and start surfing the web, visiting your online banking service to check your balance and pay a couple of bills. Unfortunately, the access point you're using is actually a hacker's laptop, and they're intercepting your original HTTP request and redirecting you to a clone of your bank's site instead of the real thing. Now your private data is exposed to the hacker.

Strict Transport Security resolves this problem; as long as you've accessed your bank's web site once using HTTPS, and the bank's web site uses Strict Transport Security, your browser will know to automatically use only HTTPS, which prevents hackers from performing this sort of man-in-the-middle attack.

Do note that HSTS does not work if you’ve never visited the website before. A website needs to tell you it is HTTPS only.

Set up HSTS in Apache2

Edit your apache configuration file (/etc/apache2/sites-enabled/website.conf and /etc/apache2/httpd.conf for example) and add the following to your VirtualHost:

# Optionally load the headers module:
LoadModule headers_module modules/mod_headers.so

<VirtualHost 67.89.123.45:443>
    Header always set Strict-Transport-Security "max-age=63072000; includeSubdomains; preload"
</VirtualHost>

Now your website will set the header every time someone visits, with an expiration date of two years (in seconds). It sets it at every visit. So tomorrow, it will say two years again.
You do have to set it on the HTTPS vhost only. It cannot be in the http vhost.

To redirect your visitors to the HTTPS version of your website, use the following configuration:

<VirtualHost *:80>
  [...]
  ServerName example.com
  Redirect permanent / https://example.com/
</VirtualHost>

If you only redirect, you dont even need a document root.

You can also use modrewrite, however the above method is simpler and safer. However, modrewrite below redirects the user to the page they were visiting over https, the above config just redirects to /:

<VirtualHost *:80>
  [...]
  <IfModule mod_rewrite.c>
    RewriteEngine On
    RewriteCond %{HTTPS} off
    RewriteRule (.*) https://%{HTTP_HOST}%{REQUEST_URI}
  </IfModule>
</VirtualHost>

And don’t forget to restart Apache.

Lighttpd

The lighttpd variant is just as simple. Add it to your Lighttpd configuration file (/etc/lighttpd/lighttpd.conf for example):

server.modules += ( "mod_setenv" )
$HTTP["scheme"] == "https" {
    setenv.add-response-header  = ( "Strict-Transport-Security" => "max-age=63072000; includeSubdomains; preload")
}

And restart Lighttpd. Here the time is also two years.

NGINX

NGINX is even shorter with its config. Add this in the server block for your HTTPS configuration:

add_header Strict-Transport-Security "max-age=63072000; includeSubdomains; preload";

Don’t forget to restart NGINX.

X-Frame-Options header

The last tip I’ll give you is the X-Frame-Options header, which you can add to your HTTPS website to make sure it is not embedded in a frame or iframe. This avoids clickjacking, and might be helpfull for HTTPS websites. Quoting the Mozilla Developer Network again:

The X-Frame-Options HTTP response header can be used to indicate whether or not a browser should be allowed to render a page in a `<frame>` or `<iframe>`. Sites can use this to avoid clickjacking attacks, by ensuring that their content is not embedded into other sites.

You can change DENY to SAMEORIGIN or ALLOW-FROM uri, see the Mozilla link above for more information on that. (Or the RFC.)

X-Frame-Options for Apache2

As above, add this to the apache config file:

Header always set X-Frame-Options DENY

Lighttpd

This goes in the lighttpd config. Make sure you don’t double the above set config, if you have that, just add the rule it to it.

server.modules += ( "mod_setenv" )
$HTTP["scheme"] == "https" {
    setenv.add-response-header  = ( "X-Frame-Options" => "DENY")
}

NGINX

Yet again, in a server block:

add_header X-Frame-Options "DENY";

Set up a federated XMPP Chat Network with ejabberd, and how to Configure and Setup SSL Certificate for Ejabberd


This tutorial shows you how to set up your own federated chat network using ejabberd. It covers a basic single node ejabberd server and also the setup of an ejabberd cluster, including errors and DNS SRV record examples. Last but not least federation is also covered. You can use (almost) any VPS.

Why set up your own XMPP server

There are a few reasons to set up your own XMPP server.

You might use Google Talk or as it now is named Hangouts. Google’s service recently changed and it is going to drop XMPP compatibility. If you have non-gmail chat contacts you can keep chatting to them. And still use an open protocol which is widely supported, not being locked in to google specific software and hardware.

Or you might want to have more control over the logging of your data. Turn of ejabberd logging and use Off The Record which gives you full privacy (and perfect forward secrecy).

You might want to use awesome multi-account chatting applications like Pidgin, Psi+, Empathy, Adium, iChat/Messages or Miranda IM. And on Android you can use Xabber, Beem or OneTeam. Did you know that big players like Facebook, WhatsApp and Google (used) to use XMPP as their primary chat protocol?

Or you might be a sysadmin in need of an internal chat solution. I’ve got a ejabberd cluster running for a client consisting of 4 Debian 7 VM’s (2GB RAM each) spread over 3 sites and 1 datacenter, serving 12000 total users and most of the time 6000 concurrently.

XMPP is an awesome and extendible protocol, on which you can find more here: https://en.wikipedia.org/wiki/XMPP

Information

This setup is tested on Debian 7, Ubuntu 12.04 and 10.04 and OS X 10.8 Server, all running ejabberd installed via the package manager, either apt or ports. It also works on Windows Server 2012 with the ejabberd compiled from the erlang source but that is not covered in this tutorial.

This tutorial uses the example.org domain as the chat domain, and the server chat.example.org as the xmpp server domain. For the clustering part the servers srv1.example.org and srv2.example.org are used. Replace these values for your setup.

Single node / master node ejabberd installation

If you want to set up a single node installation of ejabberd, e.g. no clustering, then follow only this part and the DNS part of the tutorial. If you want to set up a cluster, then also follow this part and continue with the next part.

Installing Ejabberd

This is simple, use your package manager to install ejabberd:

apt-get install ejabberd

You will also install a few dependencies for the erlang runtime.

Configuring ejabberd

We are going to configure the ejabberd service. First stop it:

/etc/init.d/ejabberd stop

Now use your favorite text editor to edit the config files. The ejabberd config is erlang config, so comments are not # but %%. Also, every config option ends with a dot (.).

vim /etc/ejabberd/ejabberd.cfg

First we are going to add our chat domain name:

{hosts, ["example.org"]}.

If you want more domains then you add them as shown below:

{hosts, ["sparklingclouds.nl", "raymii.org", "sparklingnetwork.nl"]}.

This domain name is not the name of the servers you are adding.

Next we define an admin user:

{acl, admin, {user, "remy", "example.org"}}.

remy corresponds with the part before the @ in the XMPP ID, and example.org with the part after. If you need more admin users, add another ACL line.

Now if you want people to be able to register via their XMPP client enable in band registration:

{access, register, [{allow, all}]}.

If you are using MySQL or LDAP authentication then you wouldn’t enable this.

I like to have a shared roster with roster groups, and some clients of mine use a shared roster with everybody so that nobody has to add contacts but they see all online users, enable the modsharedroster:

%% Do this in the modules block
  {mod_shared_roster,[]},

If you are pleased with the config file, save it and restart ejabberd:

/etc/init.d/ejabberd restart

We now need to register a user to test our setup. If you’ve enabled in-band registration you can use your XMPP client, and if you did not enable in-band registration you can use the ejabberdctl command:

ejabberdctl register remy example.org 'passw0rd'

Now test it using an XMPP client like Pidgin, Psi+ or Empathy. If you can connect, then you can continue with the tutorial. If you cannot connect, check your ejabberd logs, firewall setting and such to troubleshoot it.

Clustering ejabberd

Note that you have to have a correctly working master node to continue with the ejabberd clustering. If your master node is not working then fix that first.

Important: the modules you use should be the same on every cluster node. If you use LDAP/MySQL authentication, or a shared_roster, or special MUC settings, or offline messaging, for the clustering this does not matter as long as it is on all nodes.

So lets get started. We are first going to configure the master node, and then the slave nodes.

Prepare the master node

Stop the ejabberd server on the master and edit the /etc/default/ejabberd file:

vim /etc/default/ejabberd

Uncomment the hostname option and change it to a FQDN hostname:

ERLANG_NODE=ejabberd@srv1.example.org

And add the external (public) IP addres as a tuple (no dots but comma’s):

INET_DIST_INTERFACE={20,30,10,5}

If you use ejabberd internally then use the primary NIC address.

We are going to remove all the mnesia tables. They will be rebuilt with an ejabberd restart. This is way easier then changing the mnesia data itself. Don’t do this on a already configured node without backing up the erlang cookie.

First backup the erlang cookie:

cp /var/lib/ejabberd/.erlang.cookie ~/

Then remove the mnesia database:

rm /var/lib/ejabberd/*

And restore the erlang cookie:

cp ~/.erlang.cookie /var/lib/ejabberd/.erlang.cookie

To make sure all erlang processes are stopped kill all processes from the ejabberd user. This is not needed but the epmd supervisor process might still be running:

killall -u ejabberd

And start ejabberd again:

/etc/init.d/ejabberd start 

If you can still connect and chat, then continue with the next part, configuring the slave nodes.

Prepare the slave nodes

*A slave node should first be configured and working as described in the first part of this tutorial. You can copy the config files from the master node. *

Stop the ejabberd server:

/etc/init.d/ejabberd stop

Stop the ejabberd server on the master and edit the /etc/default/ejabberd file:

vim /etc/default/ejabberd

Uncomment the hostname option and change it to a FQDN hostname:

ERLANG_NODE=ejabberd@srv2.example.org

And add the external (public) IP addres as a tuple (no dots but comma’s):

INET_DIST_INTERFACE={30,40,20,6}

If you use ejabberd internally then use the primary NIC address.

Now remove all the mnesia tables:

rm /var/lib/ejabberd/*

Copy the cookie from the ejabberd master node, either by cat and vim or via scp:

# On the master node
cat /var/lib/ejabberd/.erlang.cookie
HFHHGYYEHF362GG1GF

# On the slave node
echo "HFHHGYYEHF362GG1GF" > /var/lib/ejabberd/.erlang.cookie
chown ejabberd:ejabberd /var/lib/ejabberd/.erlang.cookie

We are now going to add and compile an erlang module, the easy_cluster module. This is a very small module which adds an erlang shell command to make the cluster addition easier. You can also execute the commands in the erlang functions itself on an erlang debug shell, but I find this easier and it gives less errors:

vim /usr/lib/ejabberd/ebin/easy_cluster.erl

Add the following contents:

-module(easy_cluster).

-export([test_node/1,join/1]).

test_node(MasterNode) ->
    case net_adm:ping(MasterNode) of 'pong' ->
        io:format("server is reachable.~n");
    _ ->
        io:format("server could NOT be reached.~n")
    end.

join(MasterNode) ->
    application:stop(ejabberd),
    mnesia:stop(),
    mnesia:delete_schema([node()]),
    mnesia:start(),
    mnesia:change_config(extra_db_nodes, [MasterNode]),
    mnesia:change_table_copy_type(schema, node(), disc_copies),
    application:start(ejabberd).

Save it and compile it into a working erlang module:

cd /usr/lib/ejabberd/ebin/
erlc easy_cluster.erl

Now check if it succeeded:

ls | grep easy_cluster.beam

If you see the file it worked. You can find more info on the module here: https://github.com/chadillac/ejabberd-easy_cluster/

We are now going to join the cluster node to the master node. Make sure the master is working and running. Also make sure the erlang cookies are synchronized.

On the slave node, start an ejabberd live shell:

/etc/init.d/ejabberd live

This will start an erlang shell and it will give some output. If it stops outputting then you can press ENTER to get a prompt. Enter the following command to test if the master node can be reached:

easy_cluster:test_node('ejabberd@srv1.example.org').

You should get the following response: server is reachable. If so, continue.

Enter the following command to actually join the node:

easy_cluster:join('ejabberd@srv1.example.org').

Here’s example output from a successful test and join join:

/etc/init.d/ejabberd live
*******************************************************
* To quit, press Ctrl-g then enter q and press Return *
*******************************************************

Erlang R15B01 (erts-5.9.1)  [async-threads:0] [kernel-poll:false]

Eshell V5.9.1  (abort with ^G)

=INFO REPORT==== 10-Jun-2013::20:38:15 ===
I(<0.39.0>:cyrsasl_digest:44) : FQDN used to check DIGEST-MD5 SASL authentication: "srv2.example.org"

=INFO REPORT==== 10-Jun-2013::20:38:15 ===
I(<0.576.0>:ejabberd_listener:166) : Reusing listening port for 5222

=INFO REPORT==== 10-Jun-2013::20:38:15 ===
I(<0.577.0>:ejabberd_listener:166) : Reusing listening port for 5269

=INFO REPORT==== 10-Jun-2013::20:38:15 ===
I(<0.578.0>:ejabberd_listener:166) : Reusing listening port for 5280

=INFO REPORT==== 10-Jun-2013::20:38:15 ===
I(<0.39.0>:ejabberd_app:72) : ejabberd 2.1.10 is started in the node 'ejabberd@srv2.example.org'
easy_cluster:test_node('ejabberd@srv1.example.org').
server is reachable.
ok
(ejabberd@srv2.example.org)2> easy_cluster:join('ejabberd@srv1.example.org').

=INFO REPORT==== 10-Jun-2013::20:38:51 ===
I(<0.39.0>:ejabberd_app:89) : ejabberd 2.1.10 is stopped in the node 'ejabberd@srv2.example.org'

=INFO REPORT==== 10-Jun-2013::20:38:51 ===
    application: ejabberd
    exited: stopped
    type: temporary

=INFO REPORT==== 10-Jun-2013::20:38:51 ===
    application: mnesia
    exited: stopped
    type: permanent

=INFO REPORT==== 10-Jun-2013::20:38:52 ===
I(<0.628.0>:cyrsasl_digest:44) : FQDN used to check DIGEST-MD5 SASL authentication: "srv2.example.org"

=INFO REPORT==== 10-Jun-2013::20:38:53 ===
I(<0.1026.0>:ejabberd_listener:166) : Reusing listening port for 5222

=INFO REPORT==== 10-Jun-2013::20:38:53 ===
I(<0.1027.0>:ejabberd_listener:166) : Reusing listening port for 5269

=INFO REPORT==== 10-Jun-2013::20:38:53 ===
I(<0.1028.0>:ejabberd_listener:166) : Reusing listening port for 5280
ok
(ejabberd@srv2.example.org)3>
=INFO REPORT==== 10-Jun-2013::20:38:53 ===
I(<0.628.0>:ejabberd_app:72) : ejabberd 2.1.10 is started in the node 'ejabberd@srv2.example.org'

Exit your erlang shell by pressing CTRL+C twice. Now stop ejabberd and start it again:

/etc/init.d/ejabberd restart

You can now check in the admin webinterface if the cluster join succeeded:

http://srv1.example.org:5280/admin/nodes/

Ejabberd nodes

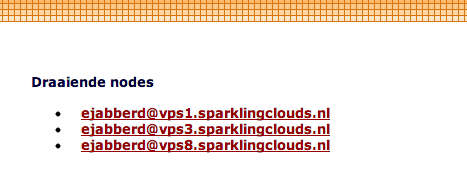
If it shows the other node you are finished. If not, see if the steps worked and check the below section on troubleshooting.

Repeat the above steps for every node you want to add. You can add as many nodes as you want.

Errors when clustering

When setting up your cluster you might run into errors. Below are my notes for the errors I found.

  • ejabberd restart does not restart epmd (erlang daemon)
    • overkill solution: killall -u ejabberd
  • ejabberd gives hostname errors
    • make sure the hostname is set correctly (hostname srv1.example.com)
  • ejabberd gives inconsistent database errors
    • backup the erlang cookie (/var/lib/ejabberd/.erlang.cookie) and then remove the contents of the /var/lib/ejabberd folder so that mnesia rebuilds its tables.
  • ejabberd reports “Connection attempt from disallowed node”
    • make sure the erlang cookie is correct (/var/lib/ejabberd/.erlang.cookie). Set vim in insert mode before pasting…

DNS SRV Records and Federation

The DNS SRV Record is used both by chat clients to find the right server address as well as by other XMPP servers for federation. Example: Alice configures her XMPP clients with the email address alice@example.org. Her chat client looks up the SRV record and knows the chat server to connect to is chat.example.org. Bob sets up his client with the address bob@bobsbussiness.com, and adds Alice as a contact. The XMPP server at bobsbussiness.com looks up the SRV record and knows that it should initiate a server2server connection tochat.example.org to federate and let Bob connect with Alice.

The BIND 9 config looks like this:

; XMPP
_xmpp-client._tcp                       IN SRV 5 0 5222 chat.example.org.
_xmpp-server._tcp                       IN SRV 5 0 5269 chat.example.org.
_jabber._tcp                            IN SRV 5 0 5269 chat.example.org.

It is your basic SRV record, both the client port and the server2server port, and legacy Jabber. If you have hosted DNS then either enter it in your panel or consult your service provider.

You can use the following dig query to verify your SRV records:

dig _xmpp-client._tcp.example.org SRV
dig _xmpp-server._tcp.example.org SRV

Or if you are on Windows and have to use nslookup:

nslookup -querytype=SRV _xmpp-client._tcp.example.org
nslookup -querytype=SRV _xmpp-server._tcp.example.org

If you get a result like this then you are set up correctly:

;; QUESTION SECTION:
;_xmpp-client._tcp.raymii.org.  IN      SRV

;; ANSWER SECTION:
_xmpp-client._tcp.raymii.org. 3600 IN   SRV     5 0 5222 chat.raymii.org.

The actual record for chat.raymii.org in my case are multiple A records:

;; ADDITIONAL SECTION:
chat.raymii.org.        3600    IN      A       84.200.77.167
chat.raymii.org.        3600    IN      A       205.185.117.74
chat.raymii.org.        3600    IN      A       205.185.124.11

But if you run a single node this can also be a CNAME or just one A/AAAA record.

Final testing

To test if it all worked you can add the Duck Duck Go XMPP bot. If this works flawlessly and you can add it and chat to it, then you have done everything correctly. The email address to add is im@ddg.gg.

Ejabberd SSL Certificate

This tutorial shows you how to set up an SSL Certificate for use with Ejabberd. It covers both the creation of the Certificate Signing Request, the preparing of the certificate for use with Ejabberd and the installation of the certificate.

This tutorial assumes a working ejabberd installation. It is tested on Debian and Ubuntu, but should work on any ejabberd installation.

Steps and Explanation

To get an SSL certificate working on ejabberd we need to do a few things:

  • Create an Certificate Signing Request (CSR) and a Private Key
  • Submit the CSR to a Certificate Authority, let them sign it and give you a Certificate
  • Combine the certificate, private key (and chain) into a ejabberd compatible PEM file
  • Install the certificate in ejabberd

With a certificate we can secure our XMPP connection and conversations. This way it is much harder for others to spy on your conversations. Combined with OTR this enabled a super secure channel for conversation.

Creating the Certificate Signing Request

Create a folder to store all the files and cd to that:

mkdir -p ~/Certificates/xmpp cd ~/Certificates/xmpp

Now use OpenSSL to create both a Private Key and a CSR. The first command will do it interactively, the second command will do it non-interactive. Make sure to set the correct values, your Common Name (CN) should be your XMPP server URL:

Interactive:

openssl req -nodes -newkey rsa:2048 -keyout private.key -out CSR.csr

Non-interactive:

openssl req -nodes -newkey rsa:2048 -keyout private.key -out CSR.csr -subj “/C=NL/ST=State/L=City/O=Company Name/OU=Department/CN=chat.example.org”

This will result in two files, CSR.csr and private.key. You now have to submit the CSR to a Certificate Authority. This can be any CA, I myself have good experiences with Xolphin, but there are others like Digicert and Verisign.

Once you have submitted your CSR and have gotten a Certificate you can continue.

Creating the ejabberd certificate

Once you have all the files (private key, certificate and certificate chain), put them all in a folder and continue. We are going to cat all the required files into a ejabberd.pem file.

This needs to happen in a specific order:

  • private key
  • certificate
  • chains

So adapt the following commands to your filenames and create the pem file:

cat private.key >> ejabberd.pem cat certificate.pem >> ejabberd.pem cat chain-1.pem >> ejabberd.pem cat chain-2.pem >> ejabberd.pem

If that all works out continue.

Installing the certificate in ejabberd

Copy the certificate to all your ejabberd servers:

scp ejabberd.pem user@srv1.example.org:

The place the certificate in the /etc/ejabberd folder:

cp ejabberd.pem /etc/ejabberd/ejabberd.pem

Now change the ejabberd config to point to the new certificate:

vim /etc/ejabberd/ejabberd.cfg

Check/change the following to point to the new certificate:

[…] {listen, [ {5222, ejabberdc2s, [ {access, c2s}, {shaper, c2sshaper}, {maxstanzasize, 65536}, starttls, {certfile, “/etc/ejabberd/ejabberd.pem”} ]}, […] {s2susestarttls, true}. {s2s_certfile, “/etc/ejabberd/ejabberd.pem”}. […]

Afterwards restart ejabberd:

/etc/init.d/ejabberd restart

You can now use any XMPP client to connect with SSL/TLS to see if it works.

Self Hosted CryptoCat – Secure self hosted multiuser webchat and SSL Certificate Setup


This is a guide on setting up a self hosted secure multiuser webchat service with CryptoCat. It covers the set up of ejabberd, nginx and the web interface for CryptoCat. It supports secure encrypted group chat, secure encrypted private chat and file and photo sharing.

There were/are some issues with the encryption provided by CryptoCat. These seem to be fixed now, but still, beware.

This tutorial is tested on Ubuntu 12.04.

Set up a DNS record

Make sure you set up two DNS A records to your chat server. One should be for example chat.sparklingclouds.nl and the other is for the conferencing: conference.chat.sparklingclouds.nl. You should contact your provider if you need help with this.

In the configuration files, you should replace chat.sparklingclouds.nl with your own domain name.

Install required packages

First we install the required packages:

apt-get install ejabberd nginx vim git

ejabberd configuration

Edit the ejabberd configuratio file located:

/etc/ejabberd/ejabberd.cfg

And place the following contents in it, replacing chat.sparklingclouds.nl with your own domain:

%% Hostname
{hosts, ["chat.sparklingclouds.nl"]}.

%% Logging
{loglevel, 0}.

{listen,
 [
  {5222, ejabberd_c2s, [
            {access, c2s},
            {shaper, c2s_shaper},
            {max_stanza_size, infinite},
                        %%zlib,
            starttls, {certfile, "/etc/ejabberd/ejabberd.pem"}
               ]},

  {5280, ejabberd_http, [
             http_bind,
             http_poll
            ]}
 ]}.

{s2s_use_starttls, true}.

{s2s_certfile, "/etc/ejabberd/ejabberd.pem"}.

{auth_method, internal}.
{auth_password_format, scram}.

{shaper, normal, {maxrate, 500000000}}.

{shaper, fast, {maxrate, 500000000}}.

{acl, local, {user_regexp, ""}}.

{access, max_user_sessions, [{10, all}]}.

{access, max_user_offline_messages, [{5000, admin}, {100, all}]}. 

{access, c2s, [{deny, blocked},
           {allow, all}]}.

{access, c2s_shaper, [{none, admin},
              {normal, all}]}.

{access, s2s_shaper, [{fast, all}]}.

{access, announce, [{allow, admin}]}.

{access, configure, [{allow, admin}]}.

{access, muc_admin, [{allow, admin}]}.

{access, muc, [{allow, all}]}.

{access, register, [{allow, all}]}.

{registration_timeout, infinity}.

{language, "en"}.

{modules,
 [
  {mod_privacy,  []},
  {mod_ping, []},
  {mod_private,  []},
  {mod_http_bind, []},
  {mod_admin_extra, []},
  {mod_muc,      [
          {host, "conference.@HOST@"},
          {access, muc},
          {access_create, muc},
          {access_persistent, muc},
          {access_admin, muc_admin},
          {max_users, 500},
          {default_room_options, [
            {allow_change_subj, false},
            {allow_private_messages, true},
            {allow_query_users, true},
            {allow_user_invites, false},
            {anonymous, true},
            {logging, false},
            {members_by_default, false},
            {members_only, false},
            {moderated, false},
            {password_protected, false},
            {persistent, false},
            {public, false},
            {public_list, true}
              ]}
                 ]},
  {mod_register, [
          {welcome_message, {"Welcome!"}},
          {access, register}
         ]}
 ]}.

NGINX Configuration

We need an SSL certificate for the web server. You can generate one yourself using the following command:

cd /etc/ssl/certs
openssl req -nodes -x509 -newkey rsa:4096 -keyout key.pem -out cert.crt -days 356

Or generate a CSR and let it sign by a “official” CA like verisign or digicert:

cd /etc/ssl/certs
openssl req -nodes -newkey rsa:4096 -keyout private.key -out CSR.csr 

When the certificate is in place you can continue to configure NGINX.

Edit the file or create a new virtual host.

vim /etc/nginx/sites-enabled/default

And place the following contents in it, replacing chat.sparklingclouds.nl with your own domain:

server {
    listen 80;
    listen [::]:80 default ipv6only=on;

    server_name chat.sparklingclouds.nl;
    rewrite     ^   https://$server_name$request_uri? permanent;

    add_header Strict-Transport-Security max-age=31536000;

    location / {
            root /var/www;
            index index.html index.htm;
    }
}

# HTTPS server
server {
    listen 443;
    server_name chat.sparklingclouds.nl;

    add_header Strict-Transport-Security max-age=31536000;

    ssl  on;
    ssl_certificate  /etc/ssl/certs/cert.crt;
    ssl_certificate_key  /etc/ssl/certs/key.pem;

    ssl_session_cache shared:SSL:10m;
    ssl_session_timeout 5m;

    ssl_protocols TLSv1.1 TLSv1.2;
            ssl_ciphers ECDHE-ECDSA-AES256-GCM-SHA384:ECDHE-RSA-RC4-SHA:ECDHE-RSA-AES128-SHA:RC4:HIGH:!MD5:!aNULL:!EDH;
            ssl_prefer_server_ciphers on;

    location / {
        root /var/www;
        index index.html index.htm;
    }

    location /http-bind {
        proxy_buffering off;
        tcp_nodelay on;
        keepalive_timeout 55;
        proxy_pass http://127.0.0.1:5280/http-bind;
    }
}

Save it and restart NGINX:

/etc/init.d/nginx restart

Cronjob for ejabberd

This is important, it cleans up unused ejabberd accounts. Create a new crontab like so:

crontab -e

And place the following in it:

1 1 * * * ejabberdctl delete-old-users 1

That way once every 24 hours the ejabberd server gets cleaned up.

Web Frontend

Note that you now already can use your own server with the CryptoCat frontend via: https://crypto.cat. We are going to set up our own frontend on our webserver so we don’t need Crypto.Cat.

Setting up a web frontend is not recommended by the cryptocat developers. See the comment below, and read the full thread on this Reddit post

When you host Cryptocat as a website, this means that every time someone wants to use it, they technically will need to re-download the entire code by visiting the website. This means that every use needs a full re-download of the Cryptocat code. By centralizing the code redistribution in a "web front-end" and making it necessary for everyone to redownload the code every time, you create an opportunity for malicious code poisoning by the host, or code injection by a third party. This is why the only recommended Cryptocat download is the browser extension from the official website, which downloads only once as opposed to every time (just like a regular desktop application), and is authenticated by Cryptocat's development team as genuine.  
Kaepora - 12-11-2013 on Reddit

Take that into consideration when setting up the frontend. A use case could be an internal cryptocat chat service where people don’t need to change the default server address and such.

First get the source code:

cd /tmp
git clone https://github.com/cryptocat/cryptocat.git

Then place it in the right folder;

cp -r cryptocat/src/core /var/www/

Edit the config file to use your own server:

cd /var/www
vim js/cryptocat.js

And place the following contents in it, replacing chat.sparklingclouds.nl with your own domain:

/* Configuration */
// Domain name to connect to for XMPP.
var defaultDomain = 'chat.sparklingclouds.nl'
// Address of the XMPP MUC server.
var defaultConferenceServer = 'conference.chat.sparklingclouds.nl'
// BOSH is served over an HTTPS proxy for better security and availability.
var defaultBOSH = 'https://chat.sparklingclouds.nl/http-bind/'

Now save the file.

You are finished now. Go to your website and test the chat out.

Ejabberd SSL Certificate

This tutorial shows you how to set up an SSL Certificate for use with Ejabberd. It covers both the creation of the Certificate Signing Request, the preparing of the certificate for use with Ejabberd and the installation of the certificate.

This tutorial assumes a working ejabberd installation. It is tested on Debian and Ubuntu, but should work on any ejabberd installation.

Steps and Explanation

To get an SSL certificate working on ejabberd we need to do a few things:

  • Create an Certificate Signing Request (CSR) and a Private Key
  • Submit the CSR to a Certificate Authority, let them sign it and give you a Certificate
  • Combine the certificate, private key (and chain) into a ejabberd compatible PEM file
  • Install the certificate in ejabberd

With a certificate we can secure our XMPP connection and conversations. This way it is much harder for others to spy on your conversations. Combined with OTR this enabled a super secure channel for conversation.

Creating the Certificate Signing Request

Create a folder to store all the files and cd to that:

mkdir -p ~/Certificates/xmpp cd ~/Certificates/xmpp

Now use OpenSSL to create both a Private Key and a CSR. The first command will do it interactively, the second command will do it non-interactive. Make sure to set the correct values, your Common Name (CN) should be your XMPP server URL:

Interactive:

openssl req -nodes -newkey rsa:2048 -keyout private.key -out CSR.csr

Non-interactive:

openssl req -nodes -newkey rsa:2048 -keyout private.key -out CSR.csr -subj “/C=NL/ST=State/L=City/O=Company Name/OU=Department/CN=chat.example.org”

This will result in two files, CSR.csr and private.key. You now have to submit the CSR to a Certificate Authority. This can be any CA, I myself have good experiences with Xolphin, but there are others like Digicert and Verisign.

Once you have submitted your CSR and have gotten a Certificate you can continue.

Creating the ejabberd certificate

Once you have all the files (private key, certificate and certificate chain), put them all in a folder and continue. We are going to cat all the required files into a ejabberd.pem file.

This needs to happen in a specific order:

  • private key
  • certificate
  • chains

So adapt the following commands to your filenames and create the pem file:

cat private.key >> ejabberd.pem cat certificate.pem >> ejabberd.pem cat chain-1.pem >> ejabberd.pem cat chain-2.pem >> ejabberd.pem

If that all works out continue.

Installing the certificate in ejabberd

Copy the certificate to all your ejabberd servers:

scp ejabberd.pem user@srv1.example.org:

The place the certificate in the /etc/ejabberd folder:

cp ejabberd.pem /etc/ejabberd/ejabberd.pem

Now change the ejabberd config to point to the new certificate:

vim /etc/ejabberd/ejabberd.cfg

Check/change the following to point to the new certificate:

[…] {listen, [ {5222, ejabberdc2s, [ {access, c2s}, {shaper, c2sshaper}, {maxstanzasize, 65536}, starttls, {certfile, “/etc/ejabberd/ejabberd.pem”} ]}, […] {s2susestarttls, true}. {s2s_certfile, “/etc/ejabberd/ejabberd.pem”}. […]

Afterwards restart ejabberd:

/etc/init.d/ejabberd restart

You can now use any XMPP client to connect with SSL/TLS to see if it works.

Complete Guide on How To Secure Linux Ubuntu


How to secure an Ubuntu

This guide is intended as a relatively easy < step by step > guide to harden the security on an Ubuntu Server.


1. Firewall – UFW

  • A good place to start is to install a Firewall.
  • UFW – Uncomplicated Firewall is a basic firewall that works very well and easy to configure with its Firewall configuration tool – gufw, or use  Shorewall, fwbuilder, or Firestarter.
  • Use Firestarter GUI to configure your firewall or refer to the Ubuntu Server Guide,  UFW manual pages or the Ubuntu UFW community documentation.
  • Install UFW and enable, open a terminal window and enter :
sudo apt-get install ufw
sudo ufw enable
  •  Check the status of the firewall.
sudo ufw status verbose

Allow SSH and Http services.

sudo ufw allow ssh
sudo ufw allow http


2. Secure shared memory.

  • /dev/shm can be used in an attack against a running service, such as httpd. Modify /etc/fstab to make it more secure.
  • Open a Terminal Window and enter the following :
sudo vi /etc/fstab

Add the following line and save. You will need to reboot for this setting to take effect :

tmpfs     /dev/shm     tmpfs     defaults,noexec,nosuid     0     0

3. SSH Hardening – disable root login and change port.

  • The easiest way to secure SSH is to disable root login and change the SSH port to something different than the standard port 22.
  • Before disabling the root login create a new SSH user and make sure the user belongs to the admin group (see step 4. below regarding the admin group).
  • If you change the SSH port also open the new port you have chosen on the firewall and close port 22.
  • Open a Terminal Window and enter :
sudo vi /etc/ssh/sshd_config
  • Change or add the following and save.
Port <ENTER YOUR PORT>
Protocol 2
PermitRootLogin no
DebianBanner no
  • Restart SSH server, open a Terminal Window and enter :
sudo /etc/init.d/ssh restart

4. Protect su by limiting access only to admin group.

  • To limit the use of su by admin users only we need to create an admin group, then add users and limit the use of su to the admin group.
  • Add a admin group to the system and add your own admin username to the group by replacing <YOUR ADMIN USERNAME> below with your admin username.
  • Open a terminal window and enter:
sudo groupadd admin
sudo usermod -a -G admin <YOUR ADMIN USERNAME>
sudo dpkg-statoverride --update --add root admin 4750 /bin/su

5. Harden network with sysctl settings.

  • The /etc/sysctl.conf file contain all the sysctl settings.
  • Prevent source routing of incoming packets and log malformed IP’s enter the following in a terminal window:
sudo vi /etc/sysctl.conf
  • Edit the /etc/sysctl.conf file and un-comment or add the following lines :
# IP Spoofing protection
net.ipv4.conf.all.rp_filter = 1
net.ipv4.conf.default.rp_filter = 1

# Ignore ICMP broadcast requests
net.ipv4.icmp_echo_ignore_broadcasts = 1

# Disable source packet routing
net.ipv4.conf.all.accept_source_route = 0
net.ipv6.conf.all.accept_source_route = 0 
net.ipv4.conf.default.accept_source_route = 0
net.ipv6.conf.default.accept_source_route = 0

# Ignore send redirects
net.ipv4.conf.all.send_redirects = 0
net.ipv4.conf.default.send_redirects = 0

# Block SYN attacks
net.ipv4.tcp_syncookies = 1
net.ipv4.tcp_max_syn_backlog = 2048
net.ipv4.tcp_synack_retries = 2
net.ipv4.tcp_syn_retries = 5

# Log Martians
net.ipv4.conf.all.log_martians = 1
net.ipv4.icmp_ignore_bogus_error_responses = 1

# Ignore ICMP redirects
net.ipv4.conf.all.accept_redirects = 0
net.ipv6.conf.all.accept_redirects = 0
net.ipv4.conf.default.accept_redirects = 0 
net.ipv6.conf.default.accept_redirects = 0

# Ignore Directed pings
net.ipv4.icmp_echo_ignore_all = 1
  • To reload sysctl with the latest changes, enter:
sudo sysctl -p

6. Disable Open DNS Recursion and Remove Version Info  – BIND DNS Server.

  • Open a Terminal and enter the following :
sudo vi /etc/bind/named.conf.options
  • Add the following to the Options section :
recursion no;
version "Not Disclosed";
  • Restart BIND DNS server. Open a Terminal and enter the following :
sudo /etc/init.d/bind9 restart

7. Prevent IP Spoofing.

  • Open a Terminal and enter the following :
sudo vi /etc/host.conf
  • Add or edit the following lines :
order bind,hosts
nospoof on


8. Harden PHP for security.

  • Edit the php.ini file :
sudo vi /etc/php5/apache2/php.ini
  • Add or edit the following lines an save :
disable_functions = exec,system,shell_exec,passthru
register_globals = Off
expose_php = Off
display_errors = Off
track_errors = Off
html_errors = Off
magic_quotes_gpc = Off
  • Restart Apache server. Open a Terminal and enter the following :
sudo /etc/init.d/apache2 restart


9. Restrict Apache Information Leakage.

  • Edit the Apache2 configuration security file :
sudo vi /etc/apache2/conf.d/security
  • Add or edit the following lines and save :
ServerTokens Prod
ServerSignature Off
TraceEnable Off
Header unset ETag
FileETag None
  • Restart Apache server. Open a Terminal and enter the following :
sudo /etc/init.d/apache2 restart

10. Scan logs and ban suspicious hosts – DenyHosts and Fail2Ban.

  • DenyHosts is a python program that automatically blocks SSH attacks by adding entries to /etc/hosts.deny. DenyHosts will also inform Linux administrators about offending hosts, attacked users and suspicious logins.
  • Open a Terminal and enter the following :
sudo apt-get install denyhosts
  • After installation edit the configuration file /etc/denyhosts.conf  and change the email, and other settings as required.
  • To edit the admin email settings open a terminal window and enter:
sudo vi /etc/denyhosts.conf
  • Change the following values as required on your server :
ADMIN_EMAIL = root@localhost
SMTP_HOST = localhost
SMTP_PORT = 25
#SMTP_USERNAME=foo
#SMTP_PASSWORD=bar
SMTP_FROM = DenyHosts nobody@localhost
#SYSLOG_REPORT=YES
  • Fail2ban is more advanced than DenyHosts as it extends the log monitoring to other services including SSH, Apache, Courier, FTP, and more.
  • Fail2ban scans log files and bans IPs that show the malicious signs — too many password failures, seeking for exploits, etc.
  • Generally Fail2Ban then used to update firewall rules to reject the IP addresses for a specified amount of time, although any arbitrary other action could also be configured.
  • Out of the box Fail2Ban comes with filters for various services (apache, courier, ftp, ssh, etc).
  • Open a Terminal and enter the following :
sudo apt-get install fail2ban
  • After installation edit the configuration file /etc/fail2ban/jail.local  and create the filter rules as required.
  • To edit the settings open a terminal window and enter:
sudo vi /etc/fail2ban/jail.conf
  • Activate all the services you would like fail2ban to monitor by changing enabled = false to enabled = true
  • For example if you would like to enable the SSH monitoring and banning jail, find the line below and change enabled from false to true. Thats it.
[ssh]

enabled  = true
port     = ssh
filter   = sshd
logpath  = /var/log/auth.log
maxretry = 3
  • If you have selected a non-standard SSH port in step 3 then you need to change the port setting in fail2ban from ssh which by default is port 22, to your new port number, for example if you have chosen 1234 then port = 1234
[ssh]

enabled  = true
port     = <ENTER YOUR SSH PORT NUMBER HERE>
filter   = sshd
logpath  = /var/log/auth.log
maxretry = 3
  • If you would like to receive emails from Fail2Ban if hosts are banned change the following line to your email address.
destemail = root@localhost
  • and change the following line from :
action = %(action_)s
  • to:
action = %(action_mwl)s
  • You can also create rule filters for the various services that you would like fail2ban to monitor that is not supplied by default.
sudo vi /etc/fail2ban/jail.local
  • Good instructions on how to configure fail2ban and create the various filters can be found on HowtoForge – click here for an example
  • When done with the configuration of Fail2Ban restart the service with :
sudo /etc/init.d/fail2ban restart
  • You can also check the status with.
sudo fail2ban-client status

11. Intrusion Detection – PSAD.

  • Cipherdyne PSAD is a collection of three lightweight system daemons that run on Linux machines and analyze iptables log messages to detect port scans and other suspicious traffic.
  • Currently version 2.1 causes errors during install on Ubuntu 12.04, but apparently does work. Version 2.2 resolves these issues but is not yet available on the Ubuntu software repositories. It is recommended to manually compile and install version 2.2 from the source files available on the Ciperdyne website.
  • To install the latest version from the source files follow these instruction : How to install PSAD Intrusion Detection on Ubuntu 12.04 LTS server
  • OR install the older version from the Ubuntu software repositories, open a Terminal and enter the following :
sudo apt-get install psad

12. Check for rootkits – RKHunter and CHKRootKit.

  • Both RKHunter and CHKRootkit basically do the same thing – check your system for rootkits. No harm in using both.
  • Open a Terminal and enter the following :
sudo apt-get install rkhunter chkrootkit
  • To run chkrootkit open a terminal window and enter :
sudo chkrootkit
  • To update and run RKHunter. Open a Terminal and enter the following :
sudo rkhunter --update
sudo rkhunter --propupd
sudo rkhunter --check

13. Scan open ports – Nmap.

  • Nmap (“Network Mapper”) is a free and open source utility for network discovery and security auditing.
  • Open a Terminal and enter the following :
sudo apt-get install nmap
  • Scan your system for open ports with :
nmap -v -sT localhost
  • SYN scanning with the following :
sudo nmap -v -sS localhost

14. Analyse system LOG files – LogWatch.

  • Logwatch is a customizable log analysis system. Logwatch parses through your system’s logs and creates a report analyzing areas that you specify. Logwatch is easy to use and will work right out of the package on most systems.
  • Open a Terminal and enter the following :
sudo apt-get install logwatch libdate-manip-perl
  • To view logwatch output use less :
sudo logwatch | less
  • To email a logwatch report for the past 7 days to an email address, enter the following and replace mail@domain.com with the required email. :
sudo logwatch --mailto mail@domain.com --output mail --format html --range 'between -7 days and today'

15. SELinux – Apparmor.

  • National Security Agency (NSA) has taken Linux to the next level with the introduction of Security-Enhanced Linux (SELinux). SELinux takes the existing GNU/Linux operating system and extends it with kernel and user-space modifications to make it bullet-proof.
  • More information can be found here. Ubuntu Server Guide – Apparmor
  • It is installed by default since Ubuntu 7.04.
  • Open a Terminal and enter the following :
sudo apt-get install apparmor apparmor-profiles
  • Check to see if things are running :
sudo apparmor_status


16. Audit your system security – Tiger.

  • Tiger is a security tool that can be use both as a security audit and intrusion detection system.
  • Open a Terminal and enter the following :
sudo apt-get install tiger
  • To run tiger enter :
sudo tiger
  • All Tiger output can be found in the /var/log/tiger
  • To view the tiger security reports, open a Terminal and enter the following :
sudo less /var/log/tiger/security.report.*

The Ubuntu Server Secure script

script

Requirements:

  • Ubuntu
  • Unity or Gnome Desktop installed.
  • Zenity installed.
!/bin/sh
#
# Ubuntu Server Secure script v0.1 alpha by The Fan Club 
# 
# - Zenity GUI installer version
#
echo
echo "* Ubuntu Server Secure script v0.1 alpha by The Fan Club"
echo 
echo "DISCLAIMER: Use with care. This script is provided purely for alpha testing and can harm your system if used incorrectly"
echo "NOTE: This is a GUI installer script that depends on zenity."
echo "NOTE: Run this script with  gksudo sh /path/to/script/ubuntu-server-secure.sh"
# Local Variables
TFCName="Ubuntu Server Secure"
TFCVersion="v0.1 alpha"
UserName=$(whoami)
LogDay=$(date '+%Y-%m-%d')
LogTime=$(date '+%Y-%m-%d %H:%M:%S')
LogFile=/var/log/uss_$LogDay.log
#
# Start of Zenity code 
#
selection=$(zenity  --list  --title "$TFCName $TFCVersion" --text "Select the security features you require" --checklist  --width 480 --height 550 \
--column "pick" --column "options" \
FALSE " 1. Install and configure Firewall - ufw" \
FALSE " 2. Secure shared memory - fstab" \
FALSE " 3. SSH - Disable root login and change port" \
FALSE " 4. Protect su by limiting access only to admin group" \
FALSE " 5. Harden network with sysctl settings" \
FALSE " 6. Disable Open DNS Recursion" \
FALSE " 7. Prevent IP Spoofing" \
FALSE " 8. Harden PHP for security" \
FALSE " 9. Install and configure ModSecurity" \
FALSE "10. Protect from DDOS attacks with ModEvasive" \
FALSE "11. Scan logs and ban suspicious hosts - DenyHosts" \
FALSE "12. Intrusion Detection - PSAD" \
FALSE "13. Check for RootKits - RKHunter" \
FALSE "14. Scan open Ports - Nmap" \
FALSE "15. Analyse system LOG files - LogWatch" \
FALSE "16. SELinux - Apparmor" \
FALSE "17. Audit your system security - Tiger" \
--separator=","); 

if [ ! "$selection" = "" ] 
  then
    # Start of Zenity Progress code 
    echo "$LogTime uss: [$UserName] * $TFCName $TFCVersion - Install Log Started" >> $LogFile
    (
    echo "5" ; sleep 0.1
    # 1. Install and configure Firewall
       option=$(echo $selection | grep -c "ufw")
       if [ "$option" -eq "1" ] 
         then
           echo "$LogTime uss: [$UserName] 1. Install and configure Firewall - ufw" >> $LogFile
           echo "# 1. Install and configure :Firewall - ufw"
           echo "# Check if ufw Firewall is installed..."
           echo "$LogTime uss: [$UserName] Check if ufw Firewall is installed..." >> $LogFile
           if [ -f /usr/sbin/ufw ]
             then
                echo "# ufw Firewall is already installed"
                echo "$LogTime uss: [$UserName] ufw Firewall is already installed" >> $LogFile
                #sudo ufw status verbose | zenity --title "Firewall Status - $TFCName $TFCVersion" --text-info --width 600 --height 400
           fi
           if [ ! -f /usr/sbin/ufw ]
             then
                echo "# ufw Firewall NOT installed, installing..."
                echo "$LogTime uss: [$UserName] ufw Firewall NOT installed, installing..." >> $LogFile
                sudo apt-get install -y ufw 
                sudo ufw enable
                echo "# ufw Firewall installed and enabled"
                echo "$LogTime uss: [$UserName] ufw Firewall installed and enabled" >> $LogFile               
                sudo ufw allow ssh
                     sudo ufw allow http
                    echo "# ufw Firewall ports for SSH and Http configured"
                     echo "$LogTime uss: [$UserName] ufw Firewall ports for SSH and Http configured" >> $LogFile
            fi
         fi
    echo "10" ; sleep 0.1
    # 2. secure shared memory
       option=$(echo $selection | grep -c "fstab")
       if [ "$option" -eq "1" ] 
         then
            echo "# 2. Secure shared memory."
            echo "$LogTime uss: [$UserName] 2. Secure shared memory." >> $LogFile
            echo "# Check if shared memory is secured"
               echo "$LogTime uss: [$UserName] Check if shared memory is secured" >> $LogFile           
            # Make sure fstab does not already contain a tmpfs reference
            fstab=$(grep -c "tmpfs" /etc/fstab)
            if [ ! "$fstab" -eq "0" ] 
              then
                 echo "# fstab already contains a tmpfs partition. Nothing to be done."
                 echo "$LogTime uss: [$UserName] fstab already contains a tmpfs partition. Nothing to be done." >> $LogFile
            fi
            if [ "$fstab" -eq "0" ]
              then
                 echo "# fstab being updated to secure shared memory"
                 echo "$LogTime uss: [$UserName] fstab being updated to secure shared memory" >> $LogFile
                 sudo echo "# $TFCName Script Entry - Secure Shared Memory - $LogTime" >> /etc/fstab
                 sudo echo "tmpfs     /dev/shm     tmpfs     defaults,noexec,nosuid     0     0" >> /etc/fstab
                 echo "# Shared memory secured. Reboot required"
                 echo "$LogTime uss: [$UserName] Shared memory secured. Reboot required" >> $LogFile
            fi
         fi
    echo "15" ; sleep 0.1
    # 3. SSH Hardening - disable root login and change port
       option=$(echo $selection | grep -c "SSH")
       if [ "$option" -eq "1" ] 
         then
           echo "# 3. SSH Hardening - disable root login and change port"
           echo "$LogTime uss: [$UserName] 3. SSH Hardening - disable root login and change port" >> $LogFile 
           sshNewPort=$(zenity --entry --text "Select a new SSH port?" --title "SSH Hardening - $TFCName $TFCVersion" --entry-text "22")
           echo "# Updating SSH settings"
           echo "$LogTime uss: [$UserName] Updating SSH settings" >> $LogFile 
           # Check if Port entry exists comment out old entries
           echo "$LogTime uss: [$UserName] Check if Port entry exists comment out old entries" >> $LogFile 
           sshconfigPort=$(grep -c "Port" /etc/ssh/sshd_config)
           if [ ! "$sshconfigPort" -eq "0" ] 
             then
                # if entry exists use sed to search and replace - write to tmp file - move to original
                sudo sed 's/Port/#Port/g' /etc/ssh/sshd_config > /tmp/.sshd_config
                sudo mv /etc/ssh/sshd_config /etc/ssh/ssh_config.backup
                sudo mv /tmp/.sshd_config /etc/ssh/sshd_config
           fi
           # Check if Protocol entry exists comment out old entries
           echo "$LogTime uss: [$UserName] Check if Protocol entry exists comment out old entries" >> $LogFile            
           sshconfigProtocol=$(grep -c "Protocol" /etc/ssh/sshd_config)
           if [ ! "$sshconfigProtocol" -eq "0" ] 
             then
                # if entry exists use sed to search and replace - write to tmp file - move to original
                sudo sed 's/Protocol/#Protocol/g' /etc/ssh/sshd_config > /tmp/.sshd_config
                sudo mv /etc/ssh/sshd_config /etc/ssh/ssh_config.backup
                sudo mv /tmp/.sshd_config /etc/ssh/sshd_config
           fi
           # Check if PermitRootLogin entry exists comment out old entries
              echo "$LogTime uss: [$UserName] Check if PermitRootLogin entry exists comment out old entries" >> $LogFile            
           sshconfigPermitRoot=$(grep -c "PermitRootLogin" /etc/ssh/sshd_config)
           if [ ! "$sshconfigPermitRoot" -eq "0" ] 
             then
                # if entry exists use sed to search and replace - write to tmp file - move to original 
                sudo sed 's/PermitRootLogin/#PermitRootLogin/g' /etc/ssh/sshd_config > /tmp/.sshd_config
                sudo mv /etc/ssh/sshd_config /etc/ssh/ssh_config.backup
                sudo mv /tmp/.sshd_config /etc/ssh/sshd_config
           fi
           echo "# Write new SSH configuration settings"             
           echo "$LogTime uss: [$UserName] Write new SSH configuration settings" >> $LogFile            
           sudo echo "# $TFCName Script Entry - SSH settings $LogTime" >> /etc/ssh/sshd_config
           sudo echo "Port $sshNewPort" >> /etc/ssh/sshd_config
           sudo echo "Protocol 2" >> /etc/ssh/sshd_config
           sudo echo "PermitRootLogin no" >> /etc/ssh/sshd_config
           echo "# SSH settings update complete"
              echo "$LogTime uss: [$UserName] SSH settings update complete" >> $LogFile            
           zenity --question --title "SSH Hardening - $TFCName $TFCVersion" --text "Open new SSH port $sshNewPort on UFW Firewall ?"
           if [ "$?" -eq "0" ]  
             then
                # open new port on UFW Firewall
                sudo ufw $sshNewPort
                echo "# Port $sshNewPort opened on UFW Firewall"
                echo "$LogTime uss: [$UserName] Port $sshNewPort opened on UFW Firewall" >> $LogFile            
           fi 
           if [ ! "$sshNewPort" -eq "22" ] 
             then
              zenity --question --title "SSH Hardening - $TFCName $TFCVersion" --text "Close old SSH port 22 on UFW Firewall ?"
              if [ "$?" -eq "0" ]
                then
                # close old port on UFW Firewall
                  sudo ufw deny port 22
                  echo "# Port 22 closed on UFW Firewall"
                  echo "$LogTime uss: [$UserName] Port 22 closed on UFW Firewall" >> $LogFile            
              fi 
           fi   
           zenity --question --title "SSH Hardening - $TFCName $TFCVersion" --text "Would you like to restart the SSH server now?"
           if [ "$?" -eq "0" ]
             then
                # restart SSHd
                sudo /etc/init.d/ssh restart
                echo "# SSH server restarted"
                echo "$LogTime uss: [$UserName] SSH server restarted" >> $LogFile            
           fi 
         fi      
    echo "20" ; sleep 0.1
    # 4. Protect su by limiting access only to admin group
       option=$(echo $selection | grep -c "Protect[[:space:]]su")
       if [ "$option" -eq "1" ] 
         then
            echo "# 4. Protect su by limiting access only to admin group"
            echo "$LogTime uss: [$UserName] 4. Protect su by limiting access only to admin group" >> $LogFile 
            # Get new admin group name 
            newAdminGroup=$(zenity --entry --title "Protect su - $TFCName $TFCVersion" --text "Select name of new admin group?"  --entry-text "admin")
            # Check if new group already exists
            echo "# Checking if Group: $newAdminGroup already exists"
            echo "$LogTime uss: [$UserName] Checking if Group: $newAdminGroup already exists" >> $LogFile 
            groupCheck=$(grep -c -w "$newAdminGroup" /etc/group)
            if [ ! "$groupCheck" -eq "0" ] 
              then
                 # group already exists
                 echo "# Group: $newAdminGroup already exists. Group not added"
                 echo "$LogTime uss: [$UserName] Group: $newAdminGroup already exists. Group not added" >> $LogFile     
            fi
            if [ "$groupCheck" -eq "0" ] 
              then
                 # group does not exist create new group
                 echo "# Group: $newAdminGroup does not exist"
                 echo "$LogTime uss: [$UserName] Group: $newAdminGroup does not exist" >> $LogFile     
                 sudo groupadd  $newAdminGroup          
                 echo "# Group: $newAdminGroup added"
                 echo "$LogTime uss: [$UserName] Group: $newAdminGroup added" >> $LogFile     
            fi
            # Add current administrator user to new admin group 
            addAdminUser=$(zenity --entry --title "Protect su - $TFCName $TFCVersion" --text "Which current user should be added to the new admin group?"  --entry-text "admin")
            # Check if user is already part of the admin group
            echo "# Checking if User: $addAdminUser is already part of the Group: $newAdminGroup"
            echo "$LogTime uss: [$UserName] Checking if User: $addAdminUser is already part of the Group: $newAdminGroup" >> $LogFile 
            userCheck=$(groups $addAdminUser | grep -c -w "$newAdminGroup")

            if [ ! "$userCheck" -eq "0" ] 
              then
                 # user is already part of the admin group
                 echo "# User: $addAdminUser is already part of the Group: $newAdminGroup. User not added"
                 echo "$LogTime uss: [$UserName] User: $addAdminUser is already part of the Group: $newAdminGroup. User not added" >> $LogFile     
            fi
            if [ "$userCheck" -eq "0" ] 
              then
                 # user is not part of admin group and needs to be added
                 echo "# User: $addAdminUser is not part of the Group: $newAdminGroup, adding user to group"
                 echo "$LogTime uss: [$UserName] User: $addAdminUser is not part of the Group: $newAdminGroup, adding user to group" >> $LogFile     
                 sudo usermod -a -G $newAdminGroup $addAdminUser     
                 echo "# User: $addAdminUser added to the Group: $newAdminGroup"
                 echo "$LogTime uss: [$UserName] User: $addAdminUser added to the Group: $newAdminGroup" >> $LogFile  
            fi
            # change su permission to limit access only to admin group
            echo "# Checking if dpkg state override aleady exists"
            echo "$LogTime uss: [$UserName] Checking if dpkg state override aleady exists" >> $LogFile 
            dpkgCheck=$(sudo dpkg-statoverride --list | grep -c "4750[[:space:]]/bin/su")
            if [ ! "$dpkgCheck" -eq "0" ] 
              then
                 # dpkg state override already exists. do nothing
                 echo "# User: dpkg state override already exists. Override not set."
                 echo "$LogTime uss: [$UserName] dpkg state override already exists. Override not set." >> $LogFile     
            fi
            if [ "$dpkgCheck" -eq "0" ] 
              then
                 echo "# Setting new dpkg state override"
                 echo "$LogTime uss: [$UserName] Setting new dpkg state override" >> $LogFile 
                 sudo dpkg-statoverride --update --add root $newAdminGroup 4750 /bin/su
                 echo "# dpkg state override done. /bin/su only accessible by $newAdminGroup group members"
                 echo "$LogTime uss: [$UserName] dpkg state override done. /bin/su only accessible by $newAdminGroup group members" >> $LogFile    
            fi
       fi    
    echo "25" ; sleep 0.1
    # 5. Harden network with sysctl settings
       option=$(echo $selection | grep -c "sysctl")
       if [ "$option" -eq "1" ] 
         then
           echo "# 5. Harden network with sysctl settings"
           echo "$LogTime uss: [$UserName] 5. Harden network with sysctl settings" >> $LogFile 
           echo "# Updating sysctl network settings"
           echo "$LogTime uss: [$UserName] Updating sysctl network settings" >> $LogFile 
           # Check if sysctl entry exists comment out old entries
           echo "$LogTime uss: [$UserName] Check if net.ipv4.conf.default.rp_filter entry exists comment out old entries" >> $LogFile 
           sysctlConfig1=$(grep -c "net.ipv4.conf.default.rp_filter" /etc/sysctl.conf)
           if [ ! "$sysctlConfig1" -eq "0" ] 
             then
                # if entry exists use sed to search and replace - write to tmp file - move to original
                sudo sed 's/net.ipv4.conf.default.rp_filter/#net.ipv4.conf.default.rp_filter/g' /etc/sysctl.conf > /tmp/.sysctl_config
                sudo mv /etc/sysctl.conf /etc/sysctl.conf.backup
                sudo mv /tmp/.sysctl_config /etc/sysctl.conf
           fi
           # Check if sysctl entry exists comment out old entries
           echo "$LogTime uss: [$UserName] Check if net.ipv4.conf.all.rp_filter entry exists comment out old entries" >> $LogFile            
           sysctlConfig2=$(grep -c "net.ipv4.conf.all.rp_filter" /etc/sysctl.conf)
           if [ ! "$sysctlConfig2" -eq "0" ] 
             then
                # if entry exists use sed to search and replace - write to tmp file - move to original
                sudo sed 's/net.ipv4.conf.all.rp_filter/#net.ipv4.conf.all.rp_filter/g' /etc/sysctl.conf > /tmp/.sysctl_config
                sudo mv /etc/sysctl.conf /etc/sysctl.conf.backup
                sudo mv /tmp/.sysctl_config /etc/sysctl.conf
           fi
           # Check if sysctl entry exists comment out old entries
              echo "$LogTime uss: [$UserName] Check if net.ipv4.icmp_echo_ignore_broadcasts entry exists comment out old entries" >> $LogFile            
           sysctlConfig3=$(grep -c "net.ipv4.icmp_echo_ignore_broadcasts" /etc/sysctl.conf)
           if [ ! "$sysctlConfig3" -eq "0" ] 
             then
                # if entry exists use sed to search and replace - write to tmp file - move to original
                sudo sed 's/net.ipv4.icmp_echo_ignore_broadcasts/#net.ipv4.icmp_echo_ignore_broadcasts/g' /etc/sysctl.conf > /tmp/.sysctl_config
                sudo mv /etc/sysctl.conf /etc/sysctl.conf.backup
                sudo mv /tmp/.sysctl_config /etc/sysctl.conf
           fi
           # Check if sysctl entry exists comment out old entries
           echo "$LogTime uss: [$UserName] Check if net.ipv4.tcp_syncookies entry exists comment out old entries" >> $LogFile 
           sysctlConfig4=$(grep -c "net.ipv4.tcp_syncookies" /etc/sysctl.conf)
           if [ ! "$sysctlConfig4" -eq "0" ] 
             then
                # if entry exists use sed to search and replace - write to tmp file - move to original
                sudo sed 's/net.ipv4.tcp_syncookies/#net.ipv4.tcp_syncookies/g' /etc/sysctl.conf > /tmp/.sysctl_config
                sudo mv /etc/sysctl.conf /etc/sysctl.conf.backup
                sudo mv /tmp/.sysctl_config /etc/sysctl.conf
           fi
           # Check if sysctl entry exists comment out old entries
           echo "$LogTime uss: [$UserName] Check if net.ipv4.conf.all.accept_source_route entry exists comment out old entries" >> $LogFile            
           sysctlConfig5=$(grep -c "net.ipv4.conf.all.accept_source_route" /etc/sysctl.conf)
           if [ ! "$sysctlConfig5" -eq "0" ] 
             then
                # if entry exists use sed to search and replace - write to tmp file - move to original
                sudo sed 's/net.ipv4.conf.all.accept_source_route/#net.ipv4.conf.all.accept_source_route/g' /etc/sysctl.conf > /tmp/.sysctl_config
                sudo mv /etc/sysctl.conf /etc/sysctl.conf.backup
                sudo mv /tmp/.sysctl_config /etc/sysctl.conf
           fi
           # Check if sysctl entry exists comment out old entries
              echo "$LogTime uss: [$UserName] Check if net.ipv6.conf.all.accept_source_route entry exists comment out old entries" >> $LogFile            
           sysctlConfig6=$(grep -c "net.ipv6.conf.all.accept_source_route" /etc/sysctl.conf)
           if [ ! "$sysctlConfig6" -eq "0" ] 
             then
                # if entry exists use sed to search and replace - write to tmp file - move to original
                sudo sed 's/net.ipv6.conf.all.accept_source_route/#net.ipv6.conf.all.accept_source_route/g' /etc/sysctl.conf > /tmp/.sysctl_config
                sudo mv /etc/sysctl.conf /etc/sysctl.conf.backup
                sudo mv /tmp/.sysctl_config /etc/sysctl.conf
           fi
                      # Check if sysctl entry exists comment out old entries
           echo "$LogTime uss: [$UserName] Check if net.ipv4.conf.default.accept_source_route entry exists comment out old entries" >> $LogFile 
           sysctlConfig7=$(grep -c "net.ipv4.conf.default.accept_source_route" /etc/sysctl.conf)
           if [ ! "$sysctlConfig7" -eq "0" ] 
             then
                # if entry exists use sed to search and replace - write to tmp file - move to original
                sudo sed 's/net.ipv4.conf.default.accept_source_route/#net.ipv4.conf.default.accept_source_route/g' /etc/sysctl.conf > /tmp/.sysctl_config
                sudo mv /etc/sysctl.conf /etc/sysctl.conf.backup
                sudo mv /tmp/.sysctl_config /etc/sysctl.conf
           fi
           # Check if sysctl entry exists comment out old entries
           echo "$LogTime uss: [$UserName] Check if net.ipv6.conf.default.accept_source_route entry exists comment out old entries" >> $LogFile            
           sysctlConfig8=$(grep -c "net.ipv6.conf.default.accept_source_route" /etc/sysctl.conf)
           if [ ! "$sysctlConfig8" -eq "0" ] 
             then
                # if entry exists use sed to search and replace - write to tmp file - move to original
                sudo sed 's/net.ipv6.conf.default.accept_source_route/#net.ipv6.conf.default.accept_source_route/g' /etc/sysctl.conf > /tmp/.sysctl_config
                sudo mv /etc/sysctl.conf /etc/sysctl.conf.backup
                sudo mv /tmp/.sysctl_config /etc/sysctl.conf
           fi
           # Check if sysctl entry exists comment out old entries
              echo "$LogTime uss: [$UserName] Check if net.ipv4.conf.all.log_martians entry exists comment out old entries" >> $LogFile            
           sysctlConfig9=$(grep -c "net.ipv4.conf.all.log_martians" /etc/sysctl.conf)
           if [ ! "$sysctlConfig9" -eq "0" ] 
             then
                # if entry exists use sed to search and replace - write to tmp file - move to original
                sudo sed 's/net.ipv4.conf.all.log_martians/#net.ipv4.conf.all.log_martians/g' /etc/sysctl.conf > /tmp/.sysctl_config
                sudo mv /etc/sysctl.conf /etc/sysctl.conf.backup
                sudo mv /tmp/.sysctl_config /etc/sysctl.conf
           fi
           echo "# Write new sysctl configuration settings"             
           echo "$LogTime uss: [$UserName] Write new sysctl configuration settings" >> $LogFile            
           sudo echo "# $TFCName Script Entry - sysctl settings $LogTime" >> /etc/sysctl.conf
           sudo echo "net.ipv4.conf.default.rp_filter = 1" >> /etc/sysctl.conf
           sudo echo "net.ipv4.conf.all.rp_filter = 1" >> /etc/sysctl.conf
           sudo echo "net.ipv4.icmp_echo_ignore_broadcasts = 1" >> /etc/sysctl.conf
           sudo echo "net.ipv4.tcp_syncookies = 1" >> /etc/sysctl.conf
           sudo echo "net.ipv4.conf.all.accept_source_route = 0" >> /etc/sysctl.conf
           sudo echo "net.ipv6.conf.all.accept_source_route = 0" >> /etc/sysctl.conf
           sudo echo "net.ipv4.conf.default.accept_source_route = 0" >> /etc/sysctl.conf
           sudo echo "net.ipv6.conf.default.accept_source_route = 0" >> /etc/sysctl.conf
           sudo echo "net.ipv4.conf.all.log_martians = 1" >> /etc/sysctl.conf
           echo "# sysctl settings update complete"
              echo "$LogTime uss: [$UserName] sysctl settings update complete" >> $LogFile            

           zenity --question --title "Network hardening - $TFCName $TFCVersion" --text "Would you like restart sysctl with the new settings now?"
           if [ "$?" -eq "0" ]
             then
                # reload sysctl
                sudo sysctl -p
                echo "# sysctl settings reloaded"
                echo "$LogTime uss: [$UserName] sysctl settings reloaded" >> $LogFile            
           fi 
         fi    
    echo "30" ; sleep 0.1
    # 6. Disable Open DNS Recursion - BIND DNS Server
       option=$(echo $selection | grep -c "DNS")
       if [ "$option" -eq "1" ] 
         then
            echo "# 6. Disable Open DNS Recursion - BIND DNS Server"
            echo "$LogTime uss: [$UserName] 6. Disable Open DNS Recursion - BIND DNS Server" >> $LogFile
            # Make sure DNS recursion entry does not exist
            echo "# Check if DNS recursion option exists"
            echo "$LogTime uss: [$UserName] Check if DNS recursion option exists" >> $LogFile           
            dnsRecur=$(grep -c "recursion" /etc/bind/named.conf.options )
            if [ ! "$dnsRecur" -eq "0" ] 
              then
                 # if entry exists use sed to search and replace - write to tmp file - move to original 
                 echo "# DNS recursion entry exists. Commenting out old entries"
                 echo "$LogTime uss: [$UserName] DNS recursion entry exists. Commenting out old entries" >> $LogFile            
                 sudo sed 's/recursion/#recursion/g' /etc/bind/named.conf.options > /tmp/.named_config
                 sudo mv /etc/bind/named.conf.options /etc/bind/_named.conf.options.backup
                 sudo mv /tmp/.named_config /etc/bind/named.conf.options
            fi
            # add DNS recursion option setting
            echo "# Add DNS recursion option setting"
            echo "$LogTime uss: [$UserName] Add DNS recursion option setting" >> $LogFile         
            sudo sed 's/options[[:space:]]{/options { recursion no; # $TFCName Script /g' /etc/bind/named.conf.options > /tmp/.named_config
            sudo mv /etc/bind/named.conf.options /etc/bind/_named.conf.options.backup
            sudo mv /tmp/.named_config /etc/bind/named.conf.options       
            echo "# Restart bind9 DNS server"
               echo "$LogTime uss: [$UserName] Restart bind9 DNS server" >> $LogFile          
               sudo /etc/init.d/bind9 restart
            echo "# DNS server restarted"
               echo "$LogTime uss: [$UserName] DNS server restarted" >> $LogFile                   
         fi 
    echo "35" ; sleep 0.1
    # 7. Prevent IP Spoofing
       option=$(echo $selection | grep -c "Spoofing")
       if [ "$option" -eq "1" ] 
         then
            echo "# 7. Prevent IP Spoofing"
            echo "$LogTime uss: [$UserName] 7. Prevent IP Spoofing" >> $LogFile
            # Make sure IP Spoofing entry does not exist
            echo "# Check if IP Spoofing option exists"
            echo "$LogTime uss: [$UserName] Check if IP Spoofing option exists" >> $LogFile           
            ipSpoof=$(grep -c "nospoof" /etc/host.conf )
            if [ ! "$ipSpoof" -eq "0" ] 
              then
                 # if entry exists use sed to search and replace - write to tmp file - move to original 
                 echo "# nospoof entry exists. Commenting out old entries"
                 echo "$LogTime uss: [$UserName] nospoof entry exists. Commenting out old entries" >> $LogFile            
                 sudo sed 's/nospoof/#nospoof/g' /etc/host.conf > /tmp/.host_config
                 sudo mv /etc/host.conf /etc/host.conf.backup
                 sudo mv /tmp/.host_config /etc/host.conf
            fi
            # Make sure order entry does not exist
            echo "# Check if order entry exists"
            echo "$LogTime uss: [$UserName] Check if order option exists" >> $LogFile           
            orderOp=$(grep -c "order" /etc/host.conf )
            if [ ! "$orderOp" -eq "0" ] 
              then
                 # if entry exists use sed to search and replace - write to tmp file - move to original 
                 echo "# order entry exists. Commenting out old entries"
                 echo "$LogTime uss: [$UserName] order entry exists. Commenting out old entries" >> $LogFile            
                 sudo sed 's/order/#order/g' /etc/host.conf > /tmp/.host_config
                 sudo mv /etc/host.conf /etc/host.conf.backup
                 sudo mv /tmp/.host_config /etc/host.conf
            fi
            # add new order and nospoof option settings
            echo "# Write new host configuration settings"             
            echo "$LogTime uss: [$UserName] Write new host configuration settings" >> $LogFile         
            sudo echo "# $TFCName Script Entry - IP nospoof settings $LogTime" >> /etc/host.conf
            sudo echo "order bind,hosts" >> /etc/host.conf
            sudo echo "nospoof on" >> /etc/host.conf
            echo "# host configuration settings update complete"
            echo "$LogTime uss: [$UserName] host configuration settings update complete" >> $LogFile  
               echo "# Restart bind9 DNS server"
               echo "$LogTime uss: [$UserName] Restart bind9 DNS server" >> $LogFile          
               sudo /etc/init.d/bind9 restart
            echo "# DNS server restarted"
               echo "$LogTime uss: [$UserName] DNS server restarted" >> $LogFile                  
         fi 
    echo "40" ; sleep 0.1
    # 8. Harden PHP for security
       option=$(echo $selection | grep -c "PHP")
       if [ "$option" -eq "1" ] 
         then
            echo "# 8. Harden PHP for security"
            echo "$LogTime uss: [$UserName] 8. Harden PHP for security" >> $LogFile
            # Make sure disable_functions entry does not exist
            echo "# Check if disable_functions option exists"
            echo "$LogTime uss: [$UserName] Check if disable_functions option exists" >> $LogFile           
            disPhp=$(grep -c "disable_functions" /etc/php5/apache2/php.ini )
            if [ ! "$disPhp" -eq "0" ] 
              then
                 # if entry exists use sed to search and replace - write to tmp file - move to original 
                 echo "# disable_functions entry exists. Commenting out old entries"
                 echo "$LogTime uss: [$UserName] disable_functions entry exists. Commenting out old entries" >> $LogFile            
                 sudo sed 's/disable_functions/;disable_functions/g' /etc/php5/apache2/php.ini > /tmp/.php_config
                 sudo mv /etc/php5/apache2/php.ini /etc/php5/apache2/php.ini.backup
                 sudo mv /tmp/.php_config /etc/php5/apache2/php.ini
            fi
            # Make sure register_globals entry does not exist
            echo "# Check if register_globals entry exists"
            echo "$LogTime uss: [$UserName] Check if register_globals option exists" >> $LogFile           
            gloPhp=$(grep -c "register_globals" /etc/php5/apache2/php.ini )
            if [ ! "$gloPhp" -eq "0" ] 
              then
                 # if entry exists use sed to search and replace - write to tmp file - move to original 
                 echo "# register_globals entry exists. Commenting out old entries"
                 echo "$LogTime uss: [$UserName] register_globals entry exists. Commenting out old entries" >> $LogFile            
                 sudo sed 's/register_globals/;register_globals/g' /etc/php5/apache2/php.ini > /tmp/.php_config
                 sudo mv /etc/php5/apache2/php.ini /etc/php5/apache2/php.ini.backup
                 sudo mv /tmp/.php_config /etc/php5/apache2/php.ini
            fi
            # Make sure expose_php entry does not exist
            echo "# Check if register_globals entry exists"
            echo "$LogTime uss: [$UserName] Check if register_globals option exists" >> $LogFile           
            expPhp=$(grep -c "expose_php" /etc/php5/apache2/php.ini )
            if [ ! "$expPhp" -eq "0" ] 
              then
                 # if entry exists use sed to search and replace - write to tmp file - move to original 
                 echo "# expose_php entry exists. Commenting out old entries"
                 echo "$LogTime uss: [$UserName] expose_php entry exists. Commenting out old entries" >> $LogFile            
                 sudo sed 's/expose_php/;expose_php/g' /etc/php5/apache2/php.ini > /tmp/.php_config
                 sudo mv /etc/php5/apache2/php.ini /etc/php5/apache2/php.ini.backup
                 sudo mv /tmp/.php_config /etc/php5/apache2/php.ini
            fi
            # Make sure magic_quotes_gpc entry does not exist
            echo "# Check if magic_quotes_gpc entry exists"
            echo "$LogTime uss: [$UserName] Check if magic_quotes_gpc option exists" >> $LogFile           
            expPhp=$(grep -c "magic_quotes_gpc" /etc/php5/apache2/php.ini )
            if [ ! "$expPhp" -eq "0" ] 
              then
                 # if entry exists use sed to search and replace - write to tmp file - move to original 
                 echo "# magic_quotes_gpc entry exists. Commenting out old entries"
                 echo "$LogTime uss: [$UserName] magic_quotes_gpc entry exists. Commenting out old entries" >> $LogFile            
                 sudo sed 's/magic_quotes_gpc/;magic_quotes_gpc/g' /etc/php5/apache2/php.ini > /tmp/.php_config
                 sudo mv /etc/php5/apache2/php.ini /etc/php5/apache2/php.ini.backup
                 sudo mv /tmp/.php_config /etc/php5/apache2/php.ini
            fi
            # add new PHP configuration option settings
            echo "# Write new PHP configuration settings"             
            echo "$LogTime uss: [$UserName] Write new PHP configuration settings" >> $LogFile         
            sudo echo "; $TFCName Script Entry - PHP security settings settings $LogTime" >> /etc/php5/apache2/php.ini
            sudo echo "disable_functions = exec,system,shell_exec,passthru" >> /etc/php5/apache2/php.ini
            sudo echo "register_globals = Off" >> /etc/php5/apache2/php.ini
            sudo echo "expose_php = Off" >> /etc/php5/apache2/php.ini
            sudo echo "magic_quotes_gpc = On" >> /etc/php5/apache2/php.ini            
            echo "# PHP configuration settings update complete"
            echo "$LogTime uss: [$UserName] PHP configuration settings update complete" >> $LogFile  
            # Ask to restart Apache2
            zenity --question --title "PHP Security - $TFCName $TFCVersion" --text "Would you like restart Apache2 with the new settings now?"
            if [ "$?" -eq "0" ]
             then
                # restart apache2 
                echo "# Restart Apache2 server"
                   echo "$LogTime uss: [$UserName] Restart Apache2 server" >> $LogFile          
                sudo /etc/init.d/apache2 restart
                echo "# Apache2 restarted"
                echo "$LogTime uss: [$UserName] Apache2 restarted" >> $LogFile            
            fi             
         fi
    echo "45" ; sleep 0.1
    # 9. Install ModSecurity
       option=$(echo $selection | grep -c "ModSecurity")
       if [ "$option" -eq "1" ] 
         then
            echo "# 9. Install ModSecurity"
            echo "$LogTime uss: [$UserName] 9. Install ModSecurity" >> $LogFile
            # install dependencies
            echo "# Install dependencies libxml2 libxml2-dev libxml2-utils elinks" 
            echo "$LogTime uss: [$UserName] Install dependencies libxml2 libxml2-dev libxml2-utils" >> $LogFile
            sudo apt-get install -y libxml2 libxml2-dev libxml2-utils 2>&1 | sed -u 's/.* \([0-9]\+%\)\ \+\([0-9.]\+.\) \(.*\)/\1\n# Downloading at \2\/s, ETA \3/' | zenity --progress --title="Downloading File..." --text="Installing libxml2 libxml2-dev libxml2-utils" --auto-close
            echo "# Install dependencies libaprutil1 libaprutil1-dev"
            echo "$LogTime uss: [$UserName] Install dependencies libaprutil1 libaprutil1-dev" >> $LogFile
            sudo apt-get -y install libaprutil1 libaprutil1-dev 2>&1 | sed -u 's/.* \([0-9]\+%\)\ \+\([0-9.]\+.\) \(.*\)/\1\n# Downloading at \2\/s, ETA \3/' | zenity --progress --title="Downloading File..." --text="Installing libaprutil1 libaprutil1-dev" --auto-close
            echo "# create symbolic link for 64bit users to libxml2.so.2"
            echo "$LogTime uss: [$UserName] create symbolic link for 64bit users to libxml2.so.2" >> $LogFile
            ln -s /usr/lib/x86_64-linux-gnu/libxml2.so.2 /usr/lib/libxml2.so.2
            # Install ModSecurity
            echo "# Install Apache ModSecurity"
            echo "$LogTime uss: [$UserName] Install Apache ModSecurity" >> $LogFile
            sudo apt-get install -y libapache-mod-security 2>&1 | sed -u 's/.* \([0-9]\+%\)\ \+\([0-9.]\+.\) \(.*\)/\1\n# Downloading at \2\/s, ETA \3/' | zenity --progress --title="Downloading File..." --text="Installing libaprutil1 libaprutil1-dev" --auto-close
            # Activate default configuration file
            echo "# Activate Apache ModSecurity recommended rules"
            echo "$LogTime uss: [$UserName] Activate Apache Mod Security" >> $LogFile
            sudo mv /etc/modsecurity/modsecurity.conf-recommended /etc/modsecurity/modsecurity.conf
            # Edit modsecurity.conf and change the SecRequestBody Limits as the default 128KB is too low
            RecLimit=$(zenity --entry --text "Select the page request body limit (SecRequestBodyLimit)? Default is 128KB and is very low. Value in bytes:" --title "ModSecurity Configuration - $TFCName $TFCVersion" --entry-text "131072")
            echo "# Updating ModSecurity settings"
            echo "$LogTime uss: [$UserName] Updating ModSecurity settings" >> $LogFile 
            # Check if SecRequestBodyLimit entry exists comment out old entries
            echo "$LogTime uss: [$UserName] Check if SecRequestBodyLimit entry exists comment out old entries" >> $LogFile 
            modsecSecReq=$(grep -c "SecRequestBodyLimit" /etc/modsecurity/modsecurity.conf)
            if [ ! "$modsecSecReq" -eq "0" ] 
              then
                 # if entry exists use sed to search and replace - write to tmp file - move to original
                 sudo sed 's/SecRequestBodyLimit/#SecRequestBodyLimit/g' /etc/modsecurity/modsecurity.conf > /tmp/.modsec_config
                 sudo mv /etc/modsecurity/modsecurity.conf /etc/modsecurity/modsecurity.conf.backup
                 sudo mv /tmp/.modsec_config /etc/modsecurity/modsecurity.conf
            fi
            # Check if SecRequestBodyInMemoryLimit entry exists comment out old entries
            echo "$LogTime uss: [$UserName] Check if SecRequestBodyInMemoryLimit entry exists comment out old entries" >> $LogFile            
            modsecSecReqMem=$(grep -c "SecRequestBodyInMemoryLimit" /etc/modsecurity/modsecurity.conf)
            if [ ! "$modsecSecReqMem" -eq "0" ] 
              then
                 # if entry exists use sed to search and replace - write to tmp file - move to original
                 sudo sed 's/SecRequestBodyInMemoryLimit/#SecRequestBodyInMemoryLimit/g' /etc/modsecurity/modsecurity.conf > /tmp/.modsec_config
                 sudo mv /etc/modsecurity/modsecurity.conf /etc/modsecurity/modsecurity.conf.backup
                 sudo mv /tmp/.modsec_config /etc/modsecurity/modsecurity.conf
            fi  
            echo "# Write new ModSecurity configuration settings"             
            echo "$LogTime uss: [$UserName] Write new ModSecurity configuration settings" >> $LogFile            
            sudo echo "# $TFCName Script Entry - ModSecurity settings $LogTime" >> /etc/modsecurity/modsecurity.conf
            sudo echo "SecRequestBodyLimit $RecLimit" >> /etc/modsecurity/modsecurity.conf
            sudo echo "SecRequestBodyInMemoryLimit $RecLimit" >> /etc/modsecurity/modsecurity.conf
            echo "# ModSecurity settings update complete"
               echo "$LogTime uss: [$UserName] ModSecurity settings update complete" >> $LogFile         
            # Download latest OWASP Core Rule Set
            echo "# Download latest OWASP Core Rule Set"
            echo "$LogTime uss: [$UserName] Download latest OWASP Core Rule Set for SourceForge" >> $LogFile
            sourceforgeUrl="<a href="http://sourceforge.net/projects/mod-security/files/modsecurity-crs/0-CURRENT/">http://sourceforge.net/projects/mod-security/files/modsecurity-crs/0-CUR...</a>"
            modesecurityFilePattern="modsecurity-crs_2.*"
            # Read sourceforge webpage with elinks and find the latest version filename
            crsFilename=$(elinks $sourceforgeUrl | grep -o -w --max-count=1 "$modesecurityFilePattern.tar.gz")
                # Create a tmp install folder            
            sudo mkdir /tmp/modsecurity-crs
            cd /tmp/modsecurity-crs
            # Download the latest crs from sourceforge
            echo "# Downloading Core Rule Set: $crsFilename from SourceForge"
            echo "$LogTime uss: [$UserName] Downloading Core Rule Set: $crsFilename from SourceForge" >> $LogFile
            # Download and show progress and download speed with zenity
            sudo wget $sourceforgeUrl$crsFilename 2>&1 | sed -u 's/.* \([0-9]\+%\)\ \+\([0-9.]\+.\) \(.*\)/\1\n# Downloading at \2\/s, ETA \3/' | zenity --progress --title="Downloading File..." --text="Downloading $crsFilename" --auto-close
            # UnTar and install crs rules
            sudo tar -zxvf $crsFilename
            sudo cp -R $modesecurityFilePattern/* /etc/modsecurity/
            # Delete tmp install folder
            cd /tmp
            sudo rm -R /tmp/modsecurity-crs
            # Activate the default crs ruleset
            sudo mv /etc/modsecurity/modsecurity_crs_10_config.conf.example  /etc/modsecurity/modsecurity_crs_10_config.conf
            # Enable ModSecurity in Apache2
            sudo a2enmod mod-security
            echo "# Apache2 ModSecurity installation complete"
               echo "$LogTime uss: [$UserName] Apache2 ModSecurity installation complete" >> $LogFile
            # Ask to restart Apache2
            zenity --question --title "Apache2 ModSecurity - $TFCName $TFCVersion" --text "Would you like restart Apache2 with ModSecurity?"
            if [ "$?" -eq "0" ]
             then
                # restart apache2 
                echo "# Restart Apache2 with ModSecurity"
                   echo "$LogTime uss: [$UserName] Restart Apache2 with ModSecurity" >> $LogFile          
                sudo /etc/init.d/apache2 restart
                echo "# Apache2 restarted"
                echo "$LogTime uss: [$UserName] Apache2 restarted with ModSecurity" >> $LogFile       
                # Output the Apache2 error.log file entries for ModSecurity to check status after install in zenity info box
                sudo grep "ModSecurity" /var/log/apache2/error.log | zenity --title "Apache2 ModSecurity Status - $TFCName $TFCVersion" --text-info --width 800 --height 400           
            fi
         fi
    echo "50" ; sleep 0.1
    # 10. Protect from DDOS (Denial of Service) attacks - ModEvasive
       option=$(echo $selection | grep -c "ModEvasive")
       if [ "$option" -eq "1" ] 
         then
            echo "# 10. Protect from DDOS (Denial of Service) attacks - ModEvasive"
            echo "$LogTime uss: [$UserName] 10. Protect from DDOS (Denial of Service) attacks - ModEvasive" >> $LogFile
            # Install ModEvasive
            echo "# Install Apache ModEvasive"
            echo "$LogTime uss: [$UserName] Install Apache ModEvasive" >> $LogFile
            sudo apt-get install -y libapache2-mod-evasive 2>&1 | sed -u 's/.* \([0-9]\+%\)\ \+\([0-9.]\+.\) \(.*\)/\1\n# Downloading at \2\/s, ETA \3/' | zenity --progress --title="Downloading File..." --text="Installing libapache2-mod-evasive" --auto-close
            # Create log file for ModEvasive
            sudo mkdir /var/log/mod_evasive
            # Change the log folder permissions
            sudo chown www-data:www-data /var/log/mod_evasive/
            # Enter Email address to receive notifications from ModEvasive
            echo "# Enter Email address to receive notifications from ModEvasive"
               echo "$LogTime uss: [$UserName] Enter Email address to receive notifications from ModEvasive" >> $LogFile     
            modEvaEmail=$(zenity --entry --text "Enter the email for ModEvasive notifications" --title "Apache2 ModEvasive - $TFCName $TFCVersion" --entry-text "<a href="mailto:email@domain.com">email@domain.com</a>")
            # Check for previous ModEvasive configuration file
            if [ -f /etc/apache2/mods-available/mod-evasive.conf ]
             then
                echo "# Backup previous ModEvasive configuration file"
                   echo "$LogTime uss: [$UserName] # Backup previous ModEvasive configuration file" >> $LogFile    
                sudo mv /etc/apache2/mods-available/mod-evasive.conf /etc/apache2/mods-available/mod-evasive.conf.backup
            fi
            # Writing New Configuration file for ModEvasive
            echo "# Writing New Configuration file for ModEvasive"
               echo "$LogTime uss: [$UserName] Writing New Configuration file for ModEvasive" >> $LogFile
               # Create Config file
            sudo echo "# $TFCName Script Entry - Apache2 ModEvasive Configuration $LogTime" > /etc/apache2/mods-available/mod-evasive.conf
            sudo echo "<ifmodule mod_evasive20.c>" >> /etc/apache2/mods-available/mod-evasive.conf
            sudo echo "   DOSHashTableSize 3097" >> /etc/apache2/mods-available/mod-evasive.conf
            sudo echo "   DOSPageCount  2" >> /etc/apache2/mods-available/mod-evasive.conf
            sudo echo "   DOSSiteCount  50" >> /etc/apache2/mods-available/mod-evasive.conf
            sudo echo "   DOSPageInterval 1" >> /etc/apache2/mods-available/mod-evasive.conf
            sudo echo "   DOSSiteInterval  1" >> /etc/apache2/mods-available/mod-evasive.conf
            sudo echo "   DOSBlockingPeriod  10" >> /etc/apache2/mods-available/mod-evasive.conf
            sudo echo "   DOSLogDir   /var/log/mod_evasive" >> /etc/apache2/mods-available/mod-evasive.conf
            sudo echo "   DOSEmailNotify  $modEvaEmail" >> /etc/apache2/mods-available/mod-evasive.conf
            sudo echo "   DOSWhitelist   127.0.0.1" >> /etc/apache2/mods-available/mod-evasive.conf
            sudo echo "</ifmodule>" >> /etc/apache2/mods-available/mod-evasive.conf
            # Enable ModEvasive in Apache2
            sudo a2enmod mod-evasive
            echo "# Apache2 ModEvasive installation complete"
               echo "$LogTime uss: [$UserName] Apache2 ModEvasive installation complete" >> $LogFile
            # Ask to restart Apache2
            zenity --question --title "Apache2 ModEvasive - $TFCName $TFCVersion" --text "Would you like restart Apache2 with ModEvasive?"
            if [ "$?" -eq "0" ]
             then
                # restart apache2 
                echo "# Restart Apache2 with ModSecurity"
                   echo "$LogTime uss: [$UserName] Restart Apache2 with ModEvasive" >> $LogFile          
                sudo /etc/init.d/apache2 restart
                echo "# Apache2 restarted"
                echo "$LogTime uss: [$UserName] Apache2 restarted with ModEvasive" >> $LogFile       
            fi
         fi
    echo "55" ; sleep 0.1
    # 11. Scan logs and ban suspicious hosts - DenyHosts
       option=$(echo $selection | grep -c "DenyHosts")
       if [ "$option" -eq "1" ] 
         then
            echo "# 11. Scan logs and ban suspicious hosts - DenyHosts"
            echo "$LogTime uss: [$UserName] 11. Scan logs and ban suspicious hosts - DenyHosts" >> $LogFile
            echo "# Check if Denyhosts is installed..."
            echo "$LogTime uss: [$UserName] Check if Denyhosts is installed..." >> $LogFile
            if [ -f /usr/sbin/denyhosts ]
              then
                 # RKHunter already installed
                 echo "# Denyhosts is already installed"
                 echo "$LogTime uss: [$UserName] Denyhosts is already installed" >> $LogFile
            fi
            if [ ! -f /usr/sbin/denyhosts ]
              then
                 # Install DenyHosts
                 echo "# Install DenyHosts"
                 echo "$LogTime uss: [$UserName] Install DenyHosts" >> $LogFile
                 sudo apt-get install -y denyhosts 2>&1 | sed -u 's/.* \([0-9]\+%\)\ \+\([0-9.]\+.\) \(.*\)/\1\n# Downloading at \2\/s, ETA \3/' | zenity --progress --title="Downloading File..." --text="Installing DenyHosts" --auto-close
           fi           
            # Enter Email address to receive notifications from DenyHosts
            echo "# Enter Email address to receive notifications from DenyHosts"
               echo "$LogTime uss: [$UserName] Enter Email address to receive notifications from DenyHosts" >> $LogFile     
            denyhostEmail=$(zenity --entry --text "Enter the email for DenyHosts notifications" --title "DenyHosts - $TFCName $TFCVersion" --entry-text "<a href="mailto:root@localhost">root@localhost</a>")
            denyhostFrom=$(zenity --entry --text "Enter the email from field for DenyHosts notifications" --title "DenyHosts - $TFCName $TFCVersion" --entry-text "DenyHosts <nobody@localhost>")
            # Make sure ADMIN_EMAIL entry does not exist
            echo "# Check if ADMIN_EMAIL option exists"
            echo "$LogTime uss: [$UserName] Check if ADMIN_EMAIL option exists" >> $LogFile           
            adminEmail=$(grep -c "ADMIN_EMAIL" /etc/denyhosts.conf )
            if [ ! "$adminEmail" -eq "0" ] 
              then
                 # if entry exists use sed to search and replace - write to tmp file - move to original 
                 echo "# ADMIN_EMAIL entry exists. Commenting out old entries"
                 echo "$LogTime uss: [$UserName] ADMIN_EMAIL entry exists. Commenting out old entries" >> $LogFile            
                 sudo sed 's/ADMIN_EMAIL/#ADMIN_EMAIL/g' /etc/denyhosts.conf > /tmp/.denyhosts_config
                 sudo mv /etc/denyhosts.conf /etc/denyhosts.conf.backup
                 sudo mv /tmp/.denyhosts_config /etc/denyhosts.conf
            fi
            # Make sure order entry does not exist
            echo "# Check if SMTP_FROM entry exists"
            echo "$LogTime uss: [$UserName] Check if SMTP_FROM option exists" >> $LogFile           
            smtpFrom=$(grep -c "SMTP_FROM" /etc/denyhosts.conf )
            if [ ! "$smtpFrom" -eq "0" ] 
              then
                 # if entry exists use sed to search and replace - write to tmp file - move to original 
                 echo "# SMTP_FROM entry exists. Commenting out old entries"
                 echo "$LogTime uss: [$UserName] SMTP_FROM entry exists. Commenting out old entries" >> $LogFile            
                 sudo sed 's/SMTP_FROM/#SMTP_FROM/g' /etc/denyhosts.conf > /tmp/.denyhosts_config
                 sudo mv /etc/denyhosts.conf /etc/denyhosts.conf.backup
                 sudo mv /tmp/.denyhosts_config /etc/denyhosts.conf
            fi
            # write new DenyHosts settings
            echo "# Write new DenyHosts configuration settings"             
            echo "$LogTime uss: [$UserName] Write new DenyHosts configuration settings" >> $LogFile         
            sudo echo "# $TFCName Script Entry - DenyHosts settings $LogTime" >> /etc/denyhosts.conf
            sudo echo "ADMIN_EMAIL = $denyhostEmail" >> /etc/denyhosts.conf
            sudo echo "SMTP_FROM = $denyhostFrom" >> /etc/denyhosts.conf            

            echo "# DenyHosts configuration settings update complete"
            echo "$LogTime uss: [$UserName] DenyHosts configuration settings update complete" >> $LogFile  
               echo "# Restart DenyHosts service"
               echo "$LogTime uss: [$UserName] Restart DenyHosts service" >> $LogFile          
               sudo /etc/init.d/denyhosts restart
            echo "# DenyHosts service restarted"
               echo "$LogTime uss: [$UserName] DenyHosts service restarted" >> $LogFile                  
         fi 
    echo "60" ; sleep 0.1
    # 12. Intrusion Detection - PSAD
       option=$(echo $selection | grep -c "PSAD")
       if [ "$option" -eq "1" ] 
         then
            echo "# 12. Intrusion Detection - PSAD"
            echo "$LogTime uss: [$UserName] 12. Intrusion Detection - PSAD" >> $LogFile
            echo "# Check if PSAD is installed..."
            echo "$LogTime uss: [$UserName] Check if PSAD is installed..." >> $LogFile
            if [ -f /usr/sbin/psad ]
              then
                 # PSAD already installed
                 echo "# PSAD is already installed"
                 echo "$LogTime uss: [$UserName] PSAD is already installed" >> $LogFile
            fi
            if [ ! -f /usr/sbin/psad ]
              then
                 # Install PSAD
                 echo "# Install PSAD"
                 echo "$LogTime uss: [$UserName] Install PSAD" >> $LogFile
                 sudo apt-get install -y psad 2>&1 | sed -u 's/.* \([0-9]\+%\)\ \+\([0-9.]\+.\) \(.*\)/\1\n# Downloading at \2\/s, ETA \3/' | zenity --progress --title="Downloading File..." --text="Installing PSAD" --auto-close
           fi           
            # Enter Email address to receive notifications from PSAD
            echo "# Enter Email address to receive notifications from PSAD"
               echo "$LogTime uss: [$UserName] Enter Email address to receive notifications from PSAD" >> $LogFile     
            psadEmail=$(zenity --entry --text "Enter the email for PSAD notifications" --title "PSAD - $TFCName $TFCVersion" --entry-text "<a href="mailto:root@localhost">root@localhost</a>")

            # Make sure EMAIL_ADDRESSES entry does not exist
            echo "# Check if EMAIL_ADDRESSES option exists"
            echo "$LogTime uss: [$UserName] Check if EMAIL_ADDRESSES option exists" >> $LogFile           
            psadAdminEmail=$(grep -c "EMAIL_ADDRESSES" /etc/psad/psad.conf )
            if [ ! "$psadAdminEmail" -eq "0" ] 
              then
                 # if entry exists use sed to search and replace - write to tmp file - move to original 
                 echo "# EMAIL_ADDRESSES entry exists. Commenting out old entries"
                 echo "$LogTime uss: [$UserName] EMAIL_ADDRESSES entry exists. Commenting out old entries" >> $LogFile            
                 sudo sed 's/EMAIL_ADDRESSES/#EMAIL_ADDRESSES/g' /etc/psad/psad.conf > /tmp/.psad_config
                 sudo mv /etc/psad/psad.conf /etc/psad/psad.conf.backup
                 sudo mv /tmp/.psad_config /etc/psad/psad.conf
            fi
            # Make sure ENABLE_AUTO_IDS entry does not exist
            echo "# Check if ENABLE_AUTO_IDS entry exists"
            echo "$LogTime uss: [$UserName] Check if ENABLE_AUTO_IDS option exists" >> $LogFile           
            psadIdsEmail=$(grep -c "ENABLE_AUTO_IDS_EMAILS" /etc/psad/psad.conf )
            if [ ! "$psadIdsEmail" -eq "0" ] 
              then
                 # if entry exists use sed to search and replace - write to tmp file - move to original 
                 echo "# ENABLE_AUTO_IDS entry exists. Commenting out old entries"
                 echo "$LogTime uss: [$UserName] ENABLE_AUTO_IDS entry exists. Commenting out old entries" >> $LogFile            
                 sudo sed 's/ENABLE_AUTO_IDS_EMAILS/#ENABLE_AUTO_IDS_EMAILS/g' /etc/psad/psad.conf > /tmp/.psad_config
                 sudo mv /etc/psad/psad.conf /etc/psad/psad.conf.backup
                 sudo mv /tmp/.psad_config /etc/psad/psad.conf
            fi
            # write new PSAD settings
            echo "# Write new PSAD configuration settings"             
            echo "$LogTime uss: [$UserName] Write new PSAD configuration settings" >> $LogFile         
            sudo echo "# $TFCName Script Entry - DenyHosts settings $LogTime" >> /etc/psad/psad.conf
            sudo echo "EMAIL_ADDRESSES  $psadEmail;" >> /etc/psad/psad.conf
            sudo echo "ENABLE_AUTO_IDS_EMAILS Y;" >> /etc/psad/psad.conf
            echo "# PSAD configuration settings update complete"
            echo "$LogTime uss: [$UserName] PSAD configuration settings update complete" >> $LogFile  
            echo "# Update iptables to add log rules for PSAD"
               echo "$LogTime uss: [$UserName] Update iptables to add log rules for PSAD" >> $LogFile    
               sudo iptables -A INPUT -j LOG
            sudo iptables -A FORWARD -j LOG
            sudo ip6tables -A INPUT -j LOG
            sudo ip6tables -A FORWARD -j LOG    
               echo "# Update and Restart PSAD service"
               echo "$LogTime uss: [$UserName] Update and Restart PSAD service" >> $LogFile          
               sudo psad -R
            sudo psad --sig-update
            sudo psad -H
            echo "# PSAD service updated and restarted"
               echo "$LogTime uss: [$UserName] PSAD service updated restarted" >> $LogFile                  
         fi 
     echo "65" ; sleep 0.1
    # 13. Check for rootkits - RKHunter 
       option=$(echo $selection | grep -c "RKHunter")
       if [ "$option" -eq "1" ] 
         then
           echo "$LogTime uss: [$UserName] 13. Check for rootkits - RKHunter" >> $LogFile
           echo "# 13. Check for rootkits - RKHunter"
           echo "# Check if RKHunter is installed..."
           echo "$LogTime uss: [$UserName] Check if RKHunter is installed..." >> $LogFile
           if [ -f /usr/bin/rkhunter ]
             then
                # RKHunter already installed
                echo "# RKHunter is already installed"
                echo "$LogTime uss: [$UserName] RKHunter is already installed" >> $LogFile
           fi
           if [ ! -f /usr/bin/rkhunter ]
             then
                # Install RKHunter
                echo "# RKHunter NOT installed, installing..."
                echo "$LogTime uss: [$UserName] RKHunter NOT installed, installing..." >> $LogFile
                sudo apt-get install -y rkhunter 2>&1 | sed -u 's/.* \([0-9]\+%\)\ \+\([0-9.]\+.\) \(.*\)/\1\n# Downloading at \2\/s, ETA \3/' | zenity --progress --title="Downloading File..." --text="Installing RKHunter" --auto-close
          fi
          # Update RKHunter   
           echo "# Updating RKHunter"
           echo "$LogTime uss: [$UserName] Updating RKHunter" >> $LogFile                             
           sudo rkhunter --update 2>&1 | zenity --progress --title="RKHunter - $TFCName $TFCVersion" --text="Downloading updates..." --width 400 --auto-close --percentage=33
           sudo rkhunter --propupd 2>&1 | zenity --progress --title="RKHunter - $TFCName $TFCVersion" --text="Updating properties..." --width 400 --auto-close --percentage=85
           echo "# RKHunter installed and updated"
           echo "$LogTime uss: [$UserName] RKHunter installed and updated" >> $LogFile   
          # Ask to run RKHunter scan now
           zenity --question --title "RKHunter - $TFCName $TFCVersion" --text "Would you like to run a RKHunter check now?"
           if [ "$?" -eq "0" ]
             then
                # Run RKHunter check 
                echo "# Running RKHunter check"
                   echo "$LogTime uss: [$UserName] Running RKHunter check" >> $LogFile 
                   # Run RKHunter check and output to Zenity         
                sudo rkhunter --check --nocolors --skip-keypress 2>&1 | zenity --text-info --title "RKHunter - $TFCName $TFCVersion" --width 600 --height 400
                echo "# RKHunter check done"
                echo "$LogTime uss: [$UserName] RKHunter check done" >> $LogFile       
           fi                  
         fi  
     echo "70" ; sleep 0.1
    # 14. Scan open ports - Nmap
       option=$(echo $selection | grep -c "Nmap")
       if [ "$option" -eq "1" ] 
         then
           echo "$LogTime uss: [$UserName] 14. Scan open ports - Nmap" >> $LogFile
           echo "# 14. Scan open ports - Nmap"
           echo "# Check if Nmap is installed..."
           echo "$LogTime uss: [$UserName] Check if Nmap is installed..." >> $LogFile
           if [ -f /usr/bin/nmap ]
             then
                # Nmap already installed
                echo "# Nmap is already installed"
                echo "$LogTime uss: [$UserName] Nmap is already installed" >> $LogFile
           fi
           if [ ! -f /usr/bin/nmap ]
             then
               # Install Nmap
                echo "# Nmap NOT installed, installing..."
                echo "$LogTime uss: [$UserName] Nmap NOT installed, installing..." >> $LogFile
                sudo apt-get install -y nmap 2>&1 | sed -u 's/.* \([0-9]\+%\)\ \+\([0-9.]\+.\) \(.*\)/\1\n# Downloading at \2\/s, ETA \3/' | zenity --progress --title="Downloading File..." --text="Installing Nmap" --auto-close
          fi
           echo "# Nmap installed"
           echo "$LogTime uss: [$UserName] Nmap installed" >> $LogFile   
          # Ask to run Nmap scan now
           zenity --question --title "Nmap - $TFCName $TFCVersion" --text "Would you like to run a Nmap port scan of the localhost now?"
           if [ "$?" -eq "0" ]
             then
                # Run Nmap check 
                echo "# Running Nmap localhost scan"
                   echo "$LogTime uss: [$UserName] Running Nmap locahost scan" >> $LogFile 
                   # Run Nmap check and output to Zenity         
                sudo nmap -v -sT -A localhost 2>&1 | zenity --text-info --title "Nmap Localhost Scan - $TFCName $TFCVersion" --width 800 --height 500
                echo "# Nmap check done"
                echo "$LogTime uss: [$UserName] Nmap check done" >> $LogFile       
           fi                  
         fi  
     echo "75" ; sleep 0.1
    # 15. Analyse system LOG files - LogWatch
       option=$(echo $selection | grep -c "LogWatch")
       if [ "$option" -eq "1" ] 
         then
           echo "$LogTime uss: [$UserName] 15. Analyse system LOG files - LogWatch" >> $LogFile
           echo "# 15. Analyse system LOG files - LogWatch"
           echo "# Check if LogWatch is installed..."
           echo "$LogTime uss: [$UserName] Check if LogWatch is installed..." >> $LogFile
           if [ -f /usr/sbin/logwatch ]
             then
                # LogWatch already installed
                echo "# LogWatch is already installed"
                echo "$LogTime uss: [$UserName] LogWatch is already installed" >> $LogFile
           fi
           if [ ! -f /usr/sbin/logwatch ]
             then
               # Install LogWatch
                echo "# LogWatch NOT installed, installing..."
                echo "$LogTime uss: [$UserName] LogWatch NOT installed, installing..." >> $LogFile
                sudo apt-get install -y logwatch libdate-manip-perl 2>&1 | sed -u 's/.* \([0-9]\+%\)\ \+\([0-9.]\+.\) \(.*\)/\1\n# Downloading at \2\/s, ETA \3/' | zenity --progress --title="Downloading File..." --text="Installing LogWatch" --auto-close
          fi
           echo "# LogWatch installed"
           echo "$LogTime uss: [$UserName] LogWatch installed" >> $LogFile   
          # Ask to run LogWatch scan now
           zenity --question --title "Nmap - $TFCName $TFCVersion" --text "Would you like to run a LogWatch for the past day now?"
           if [ "$?" -eq "0" ]
             then
                # Run LogWatch check 
                echo "# Running LogWatch scan"
                   echo "$LogTime uss: [$UserName] Running LogWatch scan" >> $LogFile 
                   # Run LogWatch check and output to Zenity         
                sudo logwatch | less | zenity --text-info --title "LogWatch Report - $TFCName $TFCVersion" --width 800 --height 500
                echo "# LogWatch scan done"
                echo "$LogTime uss: [$UserName] LogWatch scan done" >> $LogFile       
           fi                  
         fi    
    echo "80" ; sleep 0.1
    # 16. SELinux - Apparmor
       option=$(echo $selection | grep -c "Apparmor")
       if [ "$option" -eq "1" ] 
         then
           echo "$LogTime uss: [$UserName] 16. SELinux - Apparmor" >> $LogFile
           echo "# 16. SELinux - Apparmor"
           echo "# Check if Apparmor is installed..."
           echo "$LogTime uss: [$UserName] Check if Apparmor is installed..." >> $LogFile
           if [ -f /usr/sbin/apparmor_status ]
             then
                # Apparmor already installed
                echo "# Apparmor is already installed"
                echo "$LogTime uss: [$UserName] Apparmor is already installed" >> $LogFile
           fi
           if [ ! -f /usr/sbin/apparmor_status ]
             then
               # Install Apparmor
                echo "# Apparmor NOT installed, installing..."
                echo "$LogTime uss: [$UserName] Apparmor NOT installed, installing..." >> $LogFile
                sudo apt-get install -y apparmor apparmor-profiles 2>&1 | sed -u 's/.* \([0-9]\+%\)\ \+\([0-9.]\+.\) \(.*\)/\1\n# Downloading at \2\/s, ETA \3/' | zenity --progress --title="Downloading File..." --text="Installing Apparmor" --auto-close
          fi
           echo "# Apparmor installed"
           echo "$LogTime uss: [$UserName] Apparmor installed" >> $LogFile   
          # Ask to run Apparmor status check now
           zenity --question --title "Apparmor - $TFCName $TFCVersion" --text "Would you like to check the Apparmor status now?"
           if [ "$?" -eq "0" ]
             then
                # Run Apparmor check 
                echo "# Check Apparmor status"
                   echo "$LogTime uss: [$UserName] Check Apparmor status" >> $LogFile 
                   # Run Apparmor status check and output to Zenity         
                sudo apparmor_status 2>&1 | zenity --text-info --title "Apparmor status check - $TFCName $TFCVersion" --width 600 --height 400
                echo "# Apparmor status check done"
                echo "$LogTime uss: [$UserName] Apparmor status check done" >> $LogFile       
           fi                  
         fi  
    echo "85" ; sleep 0.1
    # 17. Audit your system security - Tiger
       option=$(echo $selection | grep -c "Tiger")
       if [ "$option" -eq "1" ] 
         then
           echo "$LogTime uss: [$UserName] 17. Audit your system security - Tiger" >> $LogFile
           echo "# 17. Audit your system security - Tiger"
           echo "# Check if Tiger is installed..."
           echo "$LogTime uss: [$UserName] Check if Tiger is installed..." >> $LogFile
           if [ -f /usr/sbin/tiger ]
             then
                # Tiger already installed
                echo "# Tiger is already installed"
                echo "$LogTime uss: [$UserName] Tiger is already installed" >> $LogFile
           fi
           if [ ! -f /usr/sbin/tiger ]
             then
               # Install Tiger
                echo "# Tiger NOT installed, installing..."
                echo "$LogTime uss: [$UserName] Tiger NOT installed, installing..." >> $LogFile
                sudo apt-get install -y tiger 2>&1 | sed -u 's/.* \([0-9]\+%\)\ \+\([0-9.]\+.\) \(.*\)/\1\n# Downloading at \2\/s, ETA \3/' | zenity --progress --title="Downloading File..." --text="Installing Tiger" --auto-close
          fi
           echo "# Tiger installed"
           echo "$LogTime uss: [$UserName] Tiger installed" >> $LogFile   
          # Ask to run Tiger audit now
           zenity --question --title "Tiger - $TFCName $TFCVersion" --text "Would you like to run a Tiger system audit now?"
           if [ "$?" -eq "0" ]
             then
                # Run Tiger audit 
                echo "# Run Tiger system audit"
                   echo "$LogTime uss: [$UserName] Run Tiger system audit" >> $LogFile 
                   # Tiger system audit and output to Zenity         
                sudo tiger -e 2>&1 | zenity --text-info --title "Tiger system audit - $TFCName $TFCVersion" --width 800 --height 500
                echo "# Tiger system audit done"
                echo "$LogTime uss: [$UserName] Tiger system audit done" >> $LogFile       
           fi                  
         fi                                              
     echo "100" ; sleep 0.1
     echo "# Installation Complete" ; sleep 0.1
     # End of Zenity Progress code
     ) |
     zenity --progress \
            --title="$TFCName $TFCVersion" \
            --text="Configuring security features..." \
            --width 500 \
            --percentage=0

     if [ "$?" = -1 ] ; then
        zenity --error \
          --text="Installation canceled."
     fi

     exit;
   fi
exit;

Setup and Configure a L2TPServer on Linux Ubuntu


Ubuntu: L2TPServer

This Guide will walk you through the process of installing a L2TP VPN Server on Ubuntu Server This configuration has been successfully tested with Android, Windows, and iOS devices.


Instructions

sudo apt-get install xl2tpd openswan ppp

IPSec / Openswan

In the /etc/ipsec.conf file copy:

config setup
    nat_traversal=yes
    virtual_private=%v4:10.0.0.0/8,%v4:192.168.0.0/16,%v4:172.16.0.0/12,%v4:!10.152.2.0/24
    #contains the networks that are allowed as subnet= for the remote client. In other words, the address ranges that may live behind a NAT router through which a client connects.
    oe=off
    protostack=netkey

conn L2TP-PSK-NAT
    rightsubnet=vhost:%priv
    also=L2TP-PSK-noNAT

conn L2TP-PSK-noNAT
    authby=secret
    pfs=no
    auto=add
    keyingtries=3
    rekey=no
    # Apple iOS doesn't send delete notify so we need dead peer detection
    # to detect vanishing clients
    dpddelay=30
    dpdtimeout=120
    dpdaction=clear
    # Set ikelifetime and keylife to same defaults windows has
    ikelifetime=8h
    keylife=1h
    type=transport
    # Replace IP address with your local IP (private, behind NAT IP is okay as well)
    left=x.x.x.x
    # For updated Windows 2000/XP clients,
    # to support old clients as well, use leftprotoport=17/%any
    leftprotoport=17/1701
    right=%any
    rightprotoport=17/%any
    #force all to be nat'ed. because of iOS
    forceencaps=yes

Make sure you follow the setup in the ipsec.conf file, the part “config setup” and “conn l2tp-psk” should be to the very left while the other text 8 spaces to the right.

In the “/etc/ipsec.secrets” file copy:

x.x.x.x   %any:  PSK "somegoodpassword"

Replace x.x.x.x with your Server’s IP

Start the IPSEC service with

/etc/init.d/ipsec start

Please verify the IPSEC service with :

sudo ipsec verify

you must get no errors.

Checking your system to see if IPsec got installed and started correctly:
Version check and ipsec on-path                                 [OK]
Linux Openswan U2.6.28/K2.6.32-32-generic-pae (netkey)
Checking for IPsec support in kernel                            [OK]
NETKEY detected, testing for disabled ICMP send_redirects       [OK]
NETKEY detected, testing for disabled ICMP accept_redirects     [OK]
Checking that pluto is running                                  [OK]
Pluto listening for IKE on udp 500                              [OK]
Pluto listening for NAT-T on udp 4500                           [OK]
Checking for 'ip' command                                       [OK]
Checking for 'iptables' command                                 [OK]
Opportunistic Encryption Support                                [DISABLED]

Create a file called “ipsec.vpn” in “/etc/init.d/”

case "$1" in
  start)
echo "Starting my Ipsec VPN"
iptables  -t nat   -A POSTROUTING -o eth0 -s 10.152.2.0/24 -j MASQUERADE
echo 1 > /proc/sys/net/ipv4/ip_forward
for each in /proc/sys/net/ipv4/conf/*
do
    echo 0 > $each/accept_redirects
    echo 0 > $each/send_redirects
done
/etc/init.d/ipsec start
/etc/init.d/xl2tpd start
;;
stop)
echo "Stopping my Ipsec VPN"
iptables --table nat --flush
echo 0 > /proc/sys/net/ipv4/ip_forward
/etc/init.d/ipsec stop
/etc/init.d/xl2tpd stop
;;
restart)
echo "Restarting my Ipsec VPN"
iptables  -t nat   -A POSTROUTING -o eth0 -s 10.152.2.0/24 -j MASQUERADE
echo 1 > /proc/sys/net/ipv4/ip_forward
for each in /proc/sys/net/ipv4/conf/*
do
    echo 0 > $each/accept_redirects
    echo 0 > $each/send_redirects
done
/etc/init.d/ipsec restart
/etc/init.d/xl2tpd restart

;;
  *)
 echo "Usage: /etc/init.d/ipsec.vpn  {start|stop|restart}"
 exit 1
  ;;
esac

This will configure the firewall forwarding. If you use a local IP pool other than 10.152.2, be sure to update it.

Then set the permission to execute:

sudo chmod 755 ipsec.vpn

Disable the ipsec default init script with

#update-rc.d -f ipsec remove

And enable the custom one.

#update-rc.d ipsec.vpn defaults

L2TP

In the file /etc/xl2tpd/xl2tpd.conf

[global]
ipsec saref = no

[lns default]
ip range = 10.152.2.2-10.152.2.254
local ip = 10.152.2.1
require chap = yes
refuse pap = yes
require authentication = yes
ppp debug = yes
pppoptfile = /etc/ppp/options.xl2tpd
length bit = yes
  • ip range = range of IP’s to give to the connecting clients
  • local ip = IP of VPN server. Value must be outside of “ip range”.
  • refuse pap = refure pap authentication
  • ppp debug = yes when testing, no when in production

Choose a good challenge-response authentication string. The secret should, ideally, be 16 characters long, and should probably be longer to ensure sufficient security. There is no minimum length requirement. In the file /etc/xl2tpd/l2tp-secrets:

* * exampleforchallengestring

In the file /etc/ppp/options.xl2tpd copy:

refuse-mschap-v2
refuse-mschap
ms-dns 8.8.8.8
ms-dns 8.8.4.4
asyncmap 0
auth
crtscts
idle 1800
mtu 1200
mru 1200
lock
hide-password
local
#debug
name l2tpd
proxyarp
lcp-echo-interval 30
lcp-echo-failure 4

ms-dns option

Here you set the dns server for your lan, this dns server are pushed to the road warrior when he connects. If you wan to add several servers just add several lines. If you need to push wins settings to the clients there is an separate option for that.

mtu / mru

openswan suggest that it’s important to reduce the mru/mtu size because l2tp/ipsec are encapsulated several times it causes overhead. Reducing this makes it possible to transmit all packages over lines with reduced mtu size.

proxyarp

Adds an entry to this system’s ARP [Address Resolution Protocol] table with the IP address of the peer and the Ethernet address of this system. This will have the effect of making the peer appear to other systems to be on the local ethernet.

name l2tpd

Is used in the ppp authentication file.

Adding Users

In the file /etc/ppp/chap-secrets copy:

user1 l2tpd chooseagoodpassword *
user2 * chooseagoodpassword *
  • client = username for the user
  • server = the name we define in the ppp.options file for xl2tpd
  • secret = password for the user
  • IP Address = leave to * for any address or define addresses from were a user can login.

Note: you can add as many user you like.


Forward

in /etc/sysctl.conf

net.ipv4.ip_forward=1

Load the new settings made in /etc/sysctl.conf

sysctl -p

Starting the VPN

sudo /etc/init.d/ipsec.vpn restart
sudo /etc/init.d/xl2tpd restart

Connecting the VPN to iOS device

  1. Go to Settings > General > Network > VPN > Add VPN Configuration > L2 TP
  2. VPN Description > the name you like
  3. Set VPN server > external ip address of the VPN server (x.x.x.x)
  4. Account > PPP username
  5. Set password > somegoodpassword
  6. Set L2T P Secret > was exampleforchallengestring
  7. Connect using the PPP username/password (user1 chooseagoodpassword)

Connecting the VPN to an Android device

  1. Go to Settings > Wireless & networks > VPN settings > Add VPN > Add L2TP/IPSec PSK VPN >
  2. VPN Name / Description > the name you like
  3. Set VPN server > external ip address of the VPN server (x.x.x.x)
  4. Set IPSec pre-shared key / password > somegoodpassword
  5. Enable L2TP secret > enable
  6. Set L2TP Secret > was exampleforchallengestring
  7. Press back, then connect using the PPP username/password (user1 chooseagoodpassword)

Debug

In case of problems this are a few commands that can help out the debugging.

sudo tcpdump -i ppp0
sudo tail -f /var/log/auth.log
sudo tail -f /var/log/syslog

You can also monitor the results on the Server with

sudo tcpdump -i eth0 host aaa.bbb.ccc.ddd and not port ssh

aaa.bbb.ccc.ddd are the public IP address of your Clients

PGP Ubuntu


PGP Ubuntu

“GnuPG uses public-key cryptography so that users may communicate securely. In a public-key system, each user has a pair of keys consisting of a private key and a public key. A user’s private key is kept secret; it need never be revealed. The public key may be given to anyone with whom the user wants to communicate.” From The GNU Privacy Handbook

GnuPG, GPG, PGP and OpenPGP

The terms “OpenPGP“, “PGP“, and “GnuPG / GPG” are often used interchangeably. This is a common mistake, since they are distinctly different.

  • OpenPGP is technically a proposed standard, although it is widely used. OpenPGP is not a program, and shouldn’t be referred to as such.
    • PGP and GnuPG are computer programs that implement the OpenPGP standard.
  • PGP is an acronym for Pretty Good Privacy, a computer program which provides cryptographic privacy and authentication.
  • GnuPG is an acronym for Gnu Privacy Guard, another computer program which provides cryptographic privacy and authentication.

Generating an OpenPGP Key

The core package required to start using OpenPGP, gnupg, is installed by default on Ubuntu systems, as is seahorse, a GNOME application for managing keys. It is called “Passwords and Keys” in Ubuntu.

There are several programs which provide a graphical interface to the GnuPG system.

  • Enigmail, an OpenPGP plugin for Mozilla Thunderbird.
    • Enigmail was available in the “Main” repository through Intrepid, but can be found in the “Universe” repository since Jaunty.
sudo apt-get install enigmail
  • GNU Privacy Assistant is a graphical user interface for the GnuPG (GNU Privacy Guard).
    • GPA is available in the “Universe” repository. See Repositories for further information on enabling repositories.
sudo apt-get install gpa
  • Seahorse is a GNOME application for managing encryption keys. It also integrates with nautilus, gedit, and in other places for encryption operations.
    • Seahorse is available in the “Main” repository.
sudo apt-get install seahorse
  • KGPG is a simple, free, open source KDE frontend for gpg.
    • KGPG is available in the “Main” repository since Intrepid, or the “Universe” repository in earlier releases.
sudo apt-get install kgpg
  • Kleopatra is another KDE frontend for gpg that is integrated with the KDE PIM (although you need to install it separately for now).
    • Kleopatra is available in the “Universe” repository and it includes S/MIME backend:
sudo apt-get install kleopatra

Using GnuPG to generate a key

  • Open a terminal and enter:
    gpg --gen-key
    • If you are using gnupg version 1.4.10 or newer, this will lead to a selection screen with the following options:
      Please select what kind of key you want:
         (1) RSA and RSA (default)
         (2) DSA and Elgamal
         (3) DSA (sign only)
         (4) RSA (sign only)
    • Select (1), which will enable both encryption and signing.
    • If you are using an older version, the selection screen will have the following options:
      Please select what kind of key you want:
         (1) DSA and Elgamal (default)
         (2) DSA (sign only)
         (5) RSA (sign only)
    • We suggest you select (5). We will generate an encryption subkey later.
    What keysize do you want? (2048)
  • A keysize of 2048 (which is the default) is also a good choice.
    Key is valid for? (0)
  • Most people make their keys valid until infinity, which is the default option. If you do this don’t forget to revoke the key when you no longer use it (see below).
  • Hit Y and proceed.
    You need a user ID to identify your key; the software constructs the user ID
    from the Real Name, Comment and Email Address in this form:
        "Heinrich Heine (Der Dichter) <heinrichh@duesseldorf.de>"
    
    Real name: Dennis Kaarsemaker
    Email address: dennis@kaarsemaker.net
    Comment: Tutorial key
    You selected this USER-ID:
        "Dennis Kaarsemaker (Tutorial key) <dennis@kaarsemaker.net>"
  • Make sure that the name on the key is not a pseudonym, and that it matches the name in your passport, or other government issued photo-identification! You can add extra e-mail addresses to the key later.
  • Type O to create your key.
    You need a Passphrase to protect your secret key.
  • You will be asked for your passphrase twice. Usually, a short sentence or phrase that isn’t easy to guess can be used. You would be asked to tap on the keyboard or do any of the things you normally do in order for randomization to take place. This is done so that the encryption algorithm has more human-entered elements, which, combined with the passphrase entered above, will result in the user’s private key.

Forgetting your passphrase will result in your key being useless.
Carefully memorize your passphrase

  • After you type your passphrase twice, the key will be generated. Please follow the instructions on the screen till you reach a screen similar to the one below.
    gpg: key D8FC66D2 marked as ultimately trusted
    public and secret key created and signed.
    
    pub   1024D/D8FC66D2 2005-09-08
          Key fingerprint = 95BD 8377 2644 DD4F 28B5  2C37 0F6E 4CA6 D8FC 66D2
    uid                  Dennis Kaarsemaker (Tutorial key) <dennis@kaarsemaker.net>
    sub   2048g/389AA63E 2005-09-08

The key-id is D8FC66D2 (yours will be different).

It is probably a good idea to set this key as default in your .bashrc.
Doing this will allow applications using GPG to automatically use your key

  • Set your key as the default key by entering this line in your ~/.bashrc.
    export GPGKEY=D8FC66D2
    • Please note that will be sourced only during your next session, unless you source it manually.
  • Now restart the gpg-agent and source your .bashrc again:
    killall -q gpg-agent
    eval $(gpg-agent --daemon)
    source ~/.bashrc

Encryption

  • If you created an “RSA (sign only)” earlier, you will probably want to add encryption capabilities. Assuming you edited ~/.bashrc as above, open a terminal again and enter:
    gpg --cert-digest-algo=SHA256 --edit-key $GPGKEY
  • This will present a dialog like the following:
    Secret key is available.
    
    pub   2048R/D8FC66D2  created: 2005-09-08  expires: never       usage: SC  
                         trust: ultimate      validity: ultimate
    [ultimate] (1). Dennis Kaarsemaker (Tutorial key) <dennis@kaarsemaker.net>
    
    Command>
  • To create a subkey, enter ‘addkey’. You will have to enter your key’s passphrase, and then you’ll see a somewhat familiar series of dialogues:
    Please select what kind of key you want:
       (2) DSA (sign only)
       (4) Elgamal (encrypt only)
       (5) RSA (sign only)
       (6) RSA (encrypt only)
  • Choose 6.
    What keysize do you want? (2048)
  • Again, 2048 is a sensible default.
    Key is valid for? (0)
  • Choose whether this encryption subkey is set to expire (default: it doesn’t). Then confirm that you want to make this subkey.
    pub   2048R/D8FC66D2  created: 2005-09-08  expires: never       usage: SC  
                         trust: ultimate      validity: ultimate
    sub   2048R/389AA63E created: 2005-09-08  expires: never       usage: E   
    [ultimate] (1). Dennis Kaarsemaker (Tutorial key) <dennis@kaarsemaker.net>
    Command>
  • Enter ‘save’, then ‘quit.’ Your key is now capable of encryption.

Creating a revocation key/certificate

  • A revocation certificate must be generated to revoke your public key if your private key has been compromised in any way.
  • It is recommended to create a revocation certificate when you create your key. Keep your revocation certificate on a medium that you can safely secure, like a thumb drive in a locked box.
  • You can create a revocation certificate by :
    gpg --output revoke.asc --gen-revoke $GPGKEY
  • The revocation key may be printed and/or stored as a file. Take care to safeguard your revocation key.

Anybody having access to your revocation certificate can revoke your key, rendering it useless

Making an ASCII armored version your public key

There are several sites out there that also allow you to paste an ASCII armored version your public key to import it. This method is often preferred, because the key comes directly from the user. The reasoning behind this preference is that a key on a keyserver may be corrupted, or the keyserver unavailable.

  • Create an ASCII armored version of your public key using GnuPG by using this command:
gpg --output mykey.asc --export -a $GPGKEY

This is the command using our example:

gpg --output mykey.asc --export -a D8FC66D2

Getting your key signed

The whole point of all this is to create a web of trust. By signing someone’s public key, you state that you have checked that the person that uses a certain keypair, is who he says he is and really is in control of the private key. This way a complete network of people who trust each other can be created. This network is called the Strongly connected set. Information about it can be found at http://pgp.cs.uu.nl/

In summary,

  1. Locate someone that lives near you and can meet with you to verify your ID.
  2. Arrange for a meeting. Bring at least one ID with photo and printed fingerprint of your OpenPGP key, ask the same from the person you will be meeting with.
  3. Print copies of your public key
    • get the last eight digits of your fingerprint: 0995 ECD6 3843 CBB3 C050 28CA E103 6EED 0123 4567
    • terminal: gpg –fingerprint 01234567 >> key.txt
    • print the resulting key.txt file and bring as many copies to the meeting as you expect to have people sign
  4. Meet, verify your IDs and exchange OpenPGP key fingerprints
  5. Sign the key of the person you’ve just met. Send him/her the key you’ve just signed.
  6. Update your keys on the keyserver, the signature you’ve just created will be uploaded.

Keysigning Guidelines

Since a signature means that you checked and verified that a certain public key belongs to a certain person who is in control of the accompanying private key, you need to follow these guidelines when signing peoples keys:

During the Event

  1. Keysigning is always done after meeting in person
  2. During this meeting you hand each other your OpenPGP key fingerprint and at least one government issued ID with a photograph. These key fingerprints are usually distributed as key fingerprint slips, created by a script such as gpg-key2ps (package: signing-party)
  3. You check whether the name on the key corresponds with the name on the ID and whether the person in front of you is indeed who he says he is.

After the Event

You now have the printed public key information from the other participants.

Example key IDs for the other participants will be E4758D1D, C27659A2, and 09026E7B. Replace these IDs with the key IDs you received from the other participants.

  1. retrieve the keys:
    • gpg –recv-keys E4758D1D C27659A2 09026E7B
  2. sign the keys:
    • gpg –sign-key E4758D1D
    • gpg –sign-key C27659A2
    • gpg –sign-key 09026E7B
  3. export the keys
    • gpg –armor –export E4758D1D –output E4758D1D.signed-by.01234567.asc
    • gpg –armor –export C27659A2 –output C27659A2.signed-by.01234567.asc
    • gpg –armor –export 09026E7B –output 09026E7B.signed-by.01234567.asc
  4. Email the key users (use the email address that was part of the key’s user ID) and attach the corresponding signature file – or – send their signed key to the key server:
    • gpg –send-keys –keyserver keyserver.ubuntu.com E4758D1D
  5. Once you receive your signed key import them to your keyring:
    • gpg –import 01234567.signed-by.E4758D1D.asc
    • gpg –import 01234567.signed-by.C27659A2.asc
    • gpg –import 01234567.signed-by.09026E7B.asc
  6. You should see your keys:
    • gpg –list-sigs 01234567
  7. Send your keys to the keyserver:
    • gpg –send-keys 01234567

Congrats you have now entered a web of trust or enlarged an existing one.

Backing up and restoring your key pair

Why should you back up your key pair? If you lose your key pair:

  • Any files encrypted with the lost key pair will be unrecoverable.
  • You will not be able to decrypt mails sent to you.
    • Decrypting emails sent to you requires your private key, this key is not stored on the keyservers.

If you lose your keypair you should revoke your key. This cannot be done without a revocation key.

Backing up your public key

  • List your public keys:
    gpg --list-keys
  • Look for the line that starts something like “pub 1024D/”. The part after the 1024D is the key_id. To export the key:
    gpg -ao _something_-public.key --export key_id

Backing up your private key

  • List your secret keys:
    gpg --list-secret-keys
  • Look for the line that starts something like “sec 1024D/”. The part after the 1024D is the key_id. To export the secret key:
    gpg -ao _something_-private.key --export-secret-keys key_id

Restoring your keys

  • To restore your keys – copy the two files created above to the machine and type:
    gpg --import _something_-public.key
    gpg --import _something_-private.key

Make sure you protect these files!

Revoking a keypair

In the event your keys are lost or compromised, you should revoke your keypair. This tells other users that your key is no longer reliable.

 For security purposes, there is no mechanism in place to revoke a key without a revocation key. As much as you might want to revoke a key, the revocation key prevents malicious revocations. Guard your revocation key with the same care you would use for your private key.
  • To revoke your key you need to first create a revocation key with the command:
gpg --gen-revoke
  • Import your revocation key, which would be stored to the file revoke.asc by default:
gpg --import revoke.asc
  • Upload the revocation key to your keyserver of choice, in the following example the key will be send to ubuntus keyserver:
gpg --keyserver keyserver.ubuntu.com --send-key 6382285E

Un-revoking a keypair

If you unintentionally revoke a key, or find that your key has in fact not been lost or compromised, it is possible to un-revoke your key. First and foremost, ensure that you do not distribute the key, or send it to the keyserver.

  • Export the key
gpg --export <key> > key.gpg
  • Split the key into multiple parts. This breaks the key down into multiple parts.
gpgsplit key.gpg
  • Find which file contains the revocation key. In most cases, it is 000002-002.sig, however you should make sure by using the following. If the sigclass is 0x20, you have the right file. Delete it.
gpg --list-packets 000002-002.sig
  • Put the key back together
cat 0000* > fixedkey.gpg
  • Remove the old key
gpg --expert --delete-key <key>
  • Import the new key
gpg --import fixedkey.gpg

GPG 2.0

GPG 2.0 is not installed as a default application on Ubuntu.

GPG 2.0 is the new kid on the block. GPG 2.0 is aimed or done for the desktops rather than embedded or server applications.

  • GnuPG2 is available in the “Main” repository since Intrepid, or in the “Universe” repository in earlier releases.
    • If you want to use gnupg2 with the firegpg firefox extension, you need to install gnupg2 first.
  • More information of GnuPG2 can be found here
  • If you are going to use gpg2 for the same purposes as outlined above then you just need to add 2 to the gpg command.
    gpg2 --gen-key

Using GPG To Sign SSH Keys

Often to access a remote server by SSH the administrator of the server will ask for your public ssh_rsa key so that he knows it is really your computer that is trying to access his server. The administrator may ask you to first sign the ssh_rsa key using GPG so that he knows the ssh_rsa key comes from you and has not been intercepted. This guide will show you how to generate your SSH and GPG keys and then how to use them to perform a secure transaction between two parties.

Ubuntu Releases

This guide should work on any Gnu/Linux operating system. This guide assumes you have already installed openssh-client and gnupg.

Generate The SSH RSA Keys

Run all commands as a regular user.

# ssh-keygen -t rsa

This will create your public and private SSH-RSA keys. The public key that the administraitor needs should be located here: ~/.ssh/id_rsa.pub.

Generate The GPG Keys

This is the output from generating a new key.

# gpg --cert-digest-algo SHA256 --default-preference-list "h10 h8 h9 h11 s9 s8 s7 s3 z2 z3 z1 z0" --gen-key
gpg (GnuPG) 1.4.6; Copyright (C) 2006 Free Software Foundation, Inc.
This program comes with ABSOLUTELY NO WARRANTY.
This is free software, and you are welcome to redistribute it
under certain conditions. See the file COPYING for details.

Please select what kind of key you want:
   (1) DSA and Elgamal (default)
   (2) DSA (sign only)
   (5) RSA (sign only)
Your selection? 5
RSA keys may be between 1024 and 4096 bits long.
What keysize do you want? (2048)
Requested keysize is 2048 bits
Please specify how long the key should be valid.
         0 = key does not expire
      <n>  = key expires in n days
      <n>w = key expires in n weeks
      <n>m = key expires in n months
      <n>y = key expires in n years
Key is valid for? (0)
Key does not expire at all
Is this correct (y/n)? y

You need a user ID to identify your key; the software constructs the user ID
from the Real Name, Comment and Email Address in this form:
    "Heinrich Heine (Der Dichter) <heinrichh@duesseldorf.de>"

Real name: mr bo jangles
Email address: bo@jangles.com
Comment: comment
You selected this USER-ID:
   "mr bo jangles (comment) <bo@jangles.com>"

Change (N)ame, (C)omment, (E)mail or (O)kay/(Q)uit? O
You need a Passphrase to protect your secret key.

#-> passphrase:

We need to generate a lot of random bytes. It is a good idea to perform
some other action (type on the keyboard, move the mouse, utilize the
disks) during the prime generation; this gives the random number
generator a better chance to gain enough entropy.
+++++.+++++++++++++++.+++++++++++++++.+++++.++++++++
We need to generate a lot of random bytes. It is a good idea to perform
some other action (type on the keyboard, move the mouse, utilize the
disks) during the prime generation; this gives the random number
generator a better chance to gain enough entropy.
+++++++++++++++++++++++++.++++++++++..+++++++++++++
public and secret key created and signed.
key marked as ultimately trusted.

pub  2048R/5F6D1662 2009-05-10 mr bo jangles (comment) <bo@jangles.com>
    Key fingerprint = D1BC 6822 0ACB 0025 8902  6DE7 87EA 4324 5F6D 1662

Your public and private GPG keys should now be located in your ~/.gnupg directory.

Put your private key on a cd-rom or a floppy disc or somewhere very safe. Do not lose it or you will be unable to sign any documents. Never give it to anyone under any circumstances. If you have given anyone your private key then you must revoke the key immediately and generate a new set.

Exchange Public Keys

It is good practice to put your public GPG key on a public key server where others can access it easily. Biglumber.com is a public key server. In order to put your public key on Biglumber you will first need to go though a verification process.

Go to Biglumber.com and put your public key on their server.

While you are at Biglumber you will need to find the public key of the administrator to whom you are planning to send your digitally signed and encrypted message. Once you have done that, you must then import the pubic key of that administrators into your keyring.

# gpg --import Administrator.pub

Now get the Administrator’s key ID, and your key ID as well:

# gpg --list-keys
pub  1024D/ABCABCAB 2005-03-26 Administrator_Email <admin@secure.ca>
pub  2048R/XYZXYZXY 2009-05-10 Your_Email_Address <user@user.ca>

Aministrator ID: ABCABCAB

Your ID: XYZXYZXY

Make a Secure Transaction

GPG will use your secret key (~/.gnupg/secring.gpg) to sign and encrypt your public ssh key (~/.ssh/id_rsa.pub).

Only the administrator will be able to decrypt the file because you are also using his public key to encrypt it.

In turn, he will only be able to decrypt it if he has your public key on his key ring.

Sign the key:

# gpg -u XYZXYZXY -r ABCABCAB --armor --sign --encrypt ~/.ssh/id_rsa.pub

Send the result (id_rsa.pub.gpg) to the administrator along with a link to where you keep your public key on Biglumber. He will verify the your information and then allow you to access his system by SSH.

In an ideal world you are only supposed to exchange public keys directly and in person. This way you know 100% that the public key truly belongs to the correct person.

Installing Metasploit Framework on Ubuntu 14.04 LTS and Debian 7


This Guide covers the installation of Metasploit Framework OSS Project on Ubuntun Linux LTS. If you do not wish to run the Open Source version or set up a development environment and do not mind giving your email address to Rapid 7 for marketing I would recommend downloading their comercial installer from http://www.metasploit.com/ Installing DependencieWe start by making sure that we have the latest packages by updating the system using apt-get:

sudo apt-get update
sudo apt-get upgrade

Now that we know that we are running an updated system we can install all the dependent packages that are needed by Metasploit Framework:

sudo apt-get install build-essential libreadline-dev libssl-dev libpq5 libpq-dev libreadline5 libsqlite3-dev libpcap-dev openjdk-7-jre git-core autoconf postgresql pgadmin3 curl zlib1g-dev libxml2-dev libxslt1-dev vncviewer libyaml-dev curl zlib1g-dev

Installing a Proper Version of Ruby

The distribution sadly does not comes by default with a proper version of Linux for us to use with Metasploit Framework and we will have to download and compile a proper one. There 2 mains ways recommended for this are using RVM or rbenv (Do not install both choose one or the other).

Installing Ruby using RVM:

curl -L https://get.rvm.io | bash -s stable
source ~/.rvm/scripts/rvm
echo "source ~/.rvm/scripts/rvm" >> ~/.bashrc
source ~/.bashrc
rvm install 2.1.5
rvm use 2.1.5 --default
ruby -v

Installing Ruby using rbenv:

cd ~
git clone git://github.com/sstephenson/rbenv.git .rbenv
echo 'export PATH="$HOME/.rbenv/bin:$PATH"' >> ~/.bashrc
echo 'eval "$(rbenv init -)"' >> ~/.bashrc
exec $SHELL

git clone git://github.com/sstephenson/ruby-build.git ~/.rbenv/plugins/ruby-build
echo 'export PATH="$HOME/.rbenv/plugins/ruby-build/bin:$PATH"' >> ~/.bashrc
exec $SHELL

rbenv install 2.1.5
rbenv global 2.1.5
ruby -v

Once the packages have been install we need to install the required Ruby libraries that metasploit depends on:

sudo gem install bundler 

Installing Nmap

One of the external tools that Metasploit uses for scanning that is not included with the sources is Nmap. Here we will cover downloading the latest source code for Nmap, compiling and installing:

mkdir ~/Development
cd ~/Development
svn co https://svn.nmap.org/nmap
cd nmap
./configure
make
sudo make install
make clean

Configuring Postgre SQL Server

We start by switching to the postgres user so we can create the user and database that we will use for Metasploit

sudo -s
su postgres

Now we create the user and Database, do record the database that you gave to the user since it will be used in the database.yml file that Metasploit and Armitage use to connect to the database.

createuser msf -P -S -R -D
createdb -O msf msf
exit
exit

If you experience problems with the database setup this fedora guide offers a good guide for troubleshooting and setup https://fedoraproject.org/wiki/Metasploit_Postgres_Setup

Installing Metasploit Framework

We will download the latest version of Metasploit Framework via Git so we can use msfupdate to keep it updated:

cd /opt
git clone https://github.com/rapid7/metasploit-framework.git
cd metasploit-framework

Install using bundler the requiered gems and versions:

cd metasploit-framework 
bundle install

WARNING: Currently there is a bug in Metasploit Framework with Symlinks: https://github.com/rapid7/metasploit-framework/issues/4602

Lets create the links to the commands so we can use them under any user and not being under the framework folder, for this we need to be in the metasploit-framework folder if not already in it:

cd metasploit-framework
sudo bash -c 'for MSF in $(ls msf*); do ln -s /opt/metasploit-framework/$MSF /usr/local/bin/$MSF;done'

Metasploit for Development and Contribution

If you wish to develop and contribute to the product you can follow the additional steps here Metasploit Dev Environment . For this you will need a GitHub account and you will fork the project in to your own account. I personally keep my dev copy of Metasploit in ~/Development folder and after an initial run of msfconsole I keep my database.yml file in ~/.msf4/cofig folder and adjust the MSF_DATABASE_CONFIG variable for it or run msfconsole with the -y option and point it to a YAML file with the correct configuration.

Installing armitage:

curl -# -o /tmp/armitage.tgz http://www.fastandeasyhacking.com/download/armitage-latest.tgz
sudo tar -xvzf /tmp/armitage.tgz -C /opt
sudo ln -s /opt/armitage/armitage /usr/local/bin/armitage
sudo ln -s /opt/armitage/teamserver /usr/local/bin/teamserver
sudo sh -c "echo java -jar /opt/armitage/armitage.jar \$\* > /opt/armitage/armitage"
sudo perl -pi -e 's/armitage.jar/\/opt\/armitage\/armitage.jar/g' /opt/armitage/teamserver

Lets create the database.yml file that will contain the configuration parameters that will be use by framework:

sudo nano /opt/metasploit-framework/config/database.yml

Copy the YAML entries and make sure you provide the password you entered in the user creating step in the password field for the database:

production:
 adapter: postgresql
 database: msf
 username: msf
 password: 
 host: 127.0.0.1
 port: 5432
 pool: 75
 timeout: 5

Create and environment variable so it is loaded by Armitage and by msfconsole when running and load the variable in to your current shell:

sudo sh -c "echo export MSF_DATABASE_CONFIG=/opt/metasploit-framework/config/database.yml >> /etc/profile"

source /etc/profile

First Run

Now we are ready to run Metasploit for the first time. My recommendation is to run it first under a regular user so the folders create under your home directory have the proper permissions. First time it runs it will create the entries needed by Metasploit in the database so it will take a while to load.

msfconsole