This article is a compilation of several interesting, unique command-line tricks that should help you squeeze more juice out of your system, improve your situational awareness of what goes on behind the curtains of the desktop, plus some rather unorthodox solutions that will melt the proverbial socks off your kernel.
Follow me for a round of creative administrative hacking.
1. Run top in batch mode
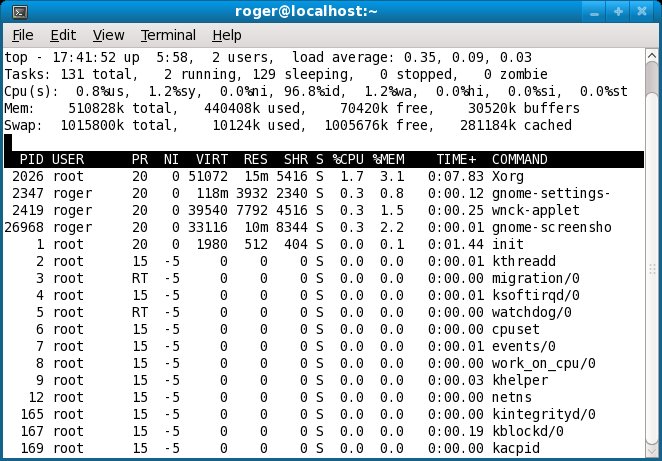
top is a handy utility for monitoring the utilization of your system. It is invoked from the command line and it works by displaying lots of useful information, including CPU and memory usage, the number of running processes, load, the top resource hitters, and other useful bits. By default, top refreshes its report every 3 seconds.
Most of us use top in this fashion; we run it inside the terminal, look on the statistics for a few seconds and then graciously quit and continue our work.
But what if you wanted to monitor the usage of your system resources unattended? In other words, let some system administration utility run and collect system information and write it to a log file every once in a while. Better yet, what if you wanted to run such a utility only for a given period of time, again without any user interaction?
There are many possible answers:
- You could schedule a job via cron.
- You could run a shell script that runs ps every X seconds or so in a loop, incrementing a counter until the desired number of interactions elapsed. But you would also need uptime to check the load and several other commands to monitor disk utilization and what not.
Instead of going wild about trying to patch a script, there’s a much, much simpler solution: top in batch mode.
top can be run non-interactively, in batch mode. Time delay and the number of iterations can be configured, giving you the ability to dictate the data collection as you see fit. Here’s an example:
top -b -d 10 -n 3 >> top-file
We have top running in batch mode (-b). It’s going to refresh every 10 seconds, as specified by the delay (-d) flag, for a total count of 3 iterations (-n). The output will be sent to a file. A few screenshots:


And that does the trick. Speaking of writing to files …
2. Write to more than one file at once with tee
In general, with static data, this is not a problem. You simply repeat the write operation. With dynamic data, again, this is not that much of a problem. You capture the output into a temporary variable and then write it to a number of files. But there’s an easier and faster way of doing it, without redirection and repetitive write operations. The answer: tee.
tee is a very useful utility that duplicates pipe content. Now, what makes tee really useful is that it can append data to existing files, making it ideal for writing periodic log information to multiple files at once.
Here’s a great example:
ps | tee file1 file2 file3
That’s it! We’re sending the output of the ps command to three different files! Or as many as we want. As you can see in the screenshots below, all three files were created at the same time and they all contain the same data. This is extremely useful for constantly changing output, which you must preserve in multiple instances without typing the same commands over and over like a keyboard-loving monkey.


Now, if you wanted to append data to files, that is periodically update them, you would use the -a flag, like this:
ps | tee -a file1 file2 file3 file4
3. Unleash the accounting power with pacct
Did you know that you can log the completion of every single process running on your machine? You may even want to do this, for security, statistical purposes, load optimization, or any other administrative reason you may think of. By default, process accounting (pacct) may not be activated on your machine. You might have to start it:
/usr/sbin/accton /var/account/pacct
Once this is done, every single process will be logged. You can find the logs under /var/account. The log itself is in binary form, so you will have to use a dumping utility to convert it to human-readable form. To this end, you use the dump-acct utility.
dump-acct pacct
The output may be very long, depending on the activity on your machine and whether you rotate the logs, which you should, since the accounting logs can inflate very quickly.

And there you go, the list of all processes ran on our host since the moment we activated the accounting. The output is printed in nice columns and includes the following, from left to right: process name, user time, system time, effective time, UID, GID, memory, and date. Other ways of starting accounting may be in the following forms:
/etc/init.d/psacct start
Or:
/etc/init.d/acct start
In fact, starting accounting using the init script is the preferred way of doing things. However, you should note that accounting is not a service in the typical form. The init script does not look for a running process – it merely checks for the lock file under /var. Therefore, if you turn the accounting on/off using the accton command, the init scripts won’t be aware of this and may report false results.
BTW, turning accounting off with accton is done just like that:
/usr/sbin/accton
When no file is specified, the accounting is turned off. When the command is run against a file, as we’ve demonstrated earlier, the accounting process is started. You should be careful when activating/deactivating the accounting and stick to one method of management, either via the accton command or using the init scripts.
4. Dump utmp and wtmp logs
Like pacct, you can also dump the contents of the utmp and wtmp files. Both these files provide login records for the host. This information may be critical, especially if applications rely on the proper output of these files to function.
Being able to analyze the records gives you the power to examine your systems in and out. Furthermore, it may help you diagnose problems with logins, for example, via VNC or ssh, non-console and console login attempts, and more.
You can dump the logs using the dump-utmp utility. There is no dump-wtmp utility; the former works for both.

You can also do the following:
dump-utmp /var/log/wtmp
Here’s what the sample file looks like:

5. Monitor CPU and disk usage with iostat
Would you like to know how your hard disks behave? Or how well does your CPU churn? iostat is a utility that reports statistics for CPU and I/O devices on your system. It can help you identify bottlenecks and mis-tuned kernel parameters, allowing you to boost the performance of your machine.
On some systems, the utility will be installed by default. Ubuntu 9.04, for example, requires that you installsysstat package, which, by the way, contains several more goodies that we will soon review:

Then, we can start monitoring the performance. I will not go into details what each little bit of displayed information means, but I will focus on one item: the first output reported by the utility is the average statistics since the last reboot.
Here’s a sample run of iostat:
iostat -x 10 10
The utility runs 10 times, every 10 seconds, reporting extended (-x) statistics. Here’s what the sample output to terminal looks like:

6. Monitor memory usage with vmstat
vmstat does the similar job, except it works with the virtual memory statistics. For Windows users, please note the term virtual does not refer to the pagefile, i.e. swap. It refers to the logical abstraction of memory in kernel, which is then translated into physical addresses.
vmstat reports information about processes, memory, paging, block IO, traps, and CPU activity. Again, it is very handy for detecting problems with system performance. Here’s a sample run of vmstat:
vmstat -x 10 10
The utility runs 10 times, reporting every 1 second. For example, we can see that out system has taken some swap, but it’s not doing anything much with it, there’s approx. 35MB free memory and there’s very little I/O activity, as there are no blocked processes. The CPU utilization spikes from just a few percents to almost 90% before calming down.
Nothing specially exciting, but in critical situations, this kind of information can be critical.

7. Combine the power of iostat and vmstat with dstat
dstat aims to replace vmstat, iostat and ifstat combined. It also offers exporting data into .csv files that can then be analyzed using spreadsheet software. dstat uses a pleasant color output in the terminal:

Plus you can make really nice graphs. The spike in the graph comes from opening the Firefox browser, for instance.


8. Collect, report or save system activity information with sar
sar is another powerful, versatile system. It is a sort of a jack o’ all trades when it comes to monitoring and logging system activity. sar can be very useful for trying to analyze strange system problems where normal logs like boot.msg, messages or secure under /var/log do not yield too much information. sar writes the daily statistics into log files under /var/log/sa. Like we did before, we can monitor CPU utilization, every 2 seconds, 10 times:
sar -u 2 10

Or you may want to monitor disk activity (10 iterations, every 5 seconds):
sar -d 5 10

Now for some really cool stuff …
9. Create UDP server-client – version 1
Here’s something radical: create a small UDP server that listens on a port. Then configure a client to send information to the server. All this without root access!
Configure server with netcat
netcat is an incredibly powerful utility that can do just about anything with TCP or UDP connections. It can open connections, listen on ports, scan ports, and much more, all this with both IPv4 and IPv6.
In our example, we will use it to create a small UDP server on one of the non-service ports. This means we won’t need root access to get it going.
netcat -l -u -p 42000
Here’s what we did:
-l tells netcat to listen, -u tells it to use UDP, -p specifies the port (42000).

We can indeed verify with netstat:
netstat -tulpen | grep 42000
And we have an open port:

Configure client
Now we need to configure the client. The big question is how to tell our process to send data to a remote machine, to a UDP port? The answer is quite simple: open a file descriptor that points to the remote server. Here’s the actual BASH script that we will use to test our connection:

The most interesting bit is the line that starts with exec.
exec 104<> /dev/udp/192.168.1.143/$1
We created a file descriptor 104 that points to our server. Now, it is possible that the file descriptor number 104 might already be in use, so you may want to check first with lsof or randomize the choice of the descriptor. Furthermore, if you have a name resolution mechanism in place, you can use a hostname instead of an IP. If you wanted to use a TCP connection, you would use /dev/tcp.
The choice of the port is defined by the $1 variable, passed as a command-line argument. You can hard code it – or make everything configurable by the user at runtime. The rest of the code is unimportant; we do something and then send information to our file descriptor, without really caring what it is. Again, we need no root access to do this.
Test connection
Now, we can see the server-client connection in action. Our server is a Ubuntu 8.10 machine, while our client is a Fedora 11. We ran the script on the client:

And watch the command-line on the server:

To make it even more exciting, I’ve created a small Flash demo with Wink. You are welcome to play the file, if you’re interested:
Cool, eh?
10. Configure UDP server-client – version 2
The limitation with the exercise above is that we do not control over some of the finer aspects of our connection. Furthermore, the connection is limited to a single end-point. If one client connects, others will be refused. To make things more exciting, we can improve our server. Instead of using netcat, we will write one of our own – in Perl.
Perl is a powerful programming language, very flexible, very neat. I must admin I have only recently began dabbling in it, so do not expect any miracles, but here’s one way of creating a UDP server in Perl – there are tons of other implementations available, better, smarter, faster, and more elegant.
The code is very simple. First, let’s take a look at the entire file and then examine sections of code. Here it is:
#!/usr/bin/perl
use IO::Socket;
$server = IO::Socket::INET->new(LocalPort => ‘50060’,
Proto => “udp”)
or die “Could not create UDP server on port
$server_port : $@n”;
my $datagram;
my $MAXSIZE = 16384; #buffer size
while (my $data=$server->recv($datagram,$MAXSIZE))
{
print $datagram;
my $logdate=`date +”%m-%d-%H:%M:%S”`;
chomp($logdate);
my $filename=”file.$logdate”;
open(FD,”>”,”$filename”);
print FD $datagram;
close(FD);
}
close($server);
The code begins with the standard Perl declaration. If you want extra debugging, you can add the -w flag. If you want to use strict code, then you may also want to add use strict; declaration. I warmly recommend this.
The next important bit is this one:
use IO::Socket;
This one tells Perl to use the IO::Socket object interface. You can also use IO:Socket::INET specifically for domain sockets. For more information, please check the official Perl documentation.
The next bit is the creation of the socket, i.e. server:
$server = IO::Socket::INET->new(LocalPort => ‘50060’,
Proto => “udp”)
or die “Could not create UDP server on port
$server_port : $@n”;
We are trying to open the local UDP port 50060. If this cannot be done, the script will die with a rather descriptive message.
Next, we define a variable that will take incoming data (datagram) and the buffer size. The buffer size might be limited by the network implementation or network restrictions on your router/switch or the kernel itself, so some values might not work for you.
And then, we have the server doing some hard work. It prints the data to the screen. But it also creates a log file with a time stamp and prints the data to the file as well.
The beauty of this implementation is that the server permits multiple incoming connections. Of course, you will have to decide how you want to differentiate the data sent by different clients, whether by a message header or using additional IO:Socket:INET objects like PeerAddr.
On the client side, nothing changes.
Conclusion
That’s it for now. This crazy collection should help you impress your boyfriends and girlfriends, evoke a smile with your peers or even your boss and help you be more detailed and productive when it comes to system administration tasks. Some of the utilities and tricks presented here are tremendously useful.
If you’re wondering what distribution you may need to be running to get these things done, don’t worry. You can get them working on all distros. Throughout this document, I demonstrated using Ubuntu 8.10, Ubuntu 9.04 and Fedora 11. Debian-based or RedHat-based, there’s something for everyone.
In the next article, we will also talk about other crazy hacks and tips, including a very, very useful utility calledsec – Simple Event Correlator. That’s just a brain teaser for now. I hope you enjoyed this article. See you around.
Hello there, dear readers. Time for the second article of highly useful, cool and fun utilities, commands, and tricks that should help you gain better productivity and understand your system better. In the first part, we learned about a whole bunch of great things, including top in batch mode, how to read process account logs, how to measure system activity with a range of programs, and how to write a simple UDP server-client.
Now, let’s see a few more tricks that will help you master a higher, cooler level of Linux knowledge and allow you to impress you significant others, including your boss.
1. Sparse files
What they be, you’re askin’. Well, sparse files are normal files – except that blocks containing only zeros are not really counted. In other words, empty space inside sparse files is just listed, without actually taking any physical space. This, in contrast to regular files, where everything is preallocated, including bits that hold no data.
If you’re a fan of virtualization, you have come across sparse files – virtual machines disks can be sparse files. If you’re creating virtual machines with, say 10GB space, but do not preallocate it, then you have witnessed sparse files in action! Dynamically expanding virtual disks are sparse files.
Sparse files have an advantage of conserving space until needed, but if you convert them back to raw format, like during the conversion of VMDK virtual disks to AM2 format for the use in Amazon EC2 cloud, then the files will be inflated back to their normal size. Now, the big question is, why sparse files, and what are they good for?
Well, sparse files are definitely useful in virtualization, but they have other uses. For example, when creating archives or copying files, you may or may not want to use the sparse option, depending on your requirements. Let’s see how we can create sparse and identify sparse files, so we can treat them accordingly.
Create sparse files
Creating sparse files is very simple. Just move the pointer to the end of the file.
dd if=/dev/zero of=file bs=1 count=0 seek=1M
For example, here we have created a zero-size file, except the metadata, which by default will take the customary block size (say 4096 bytes). But we have also moved the pointer to the end of the file, at 1M location, this creating a virtual 1MB file.

Now, using the ls command, you may think it’s a regular file:

But you need the -s flag in the ls command options to really know what’s happening. The first field in the output will be the file size, in KB:

Similarly, you can use the du command to get the accurate report:

Just for comparison, here’s what a real, 1MB file reports:


Pay attention to this when working with files. Do not get confused by crazy ls readings, because you may end up with a total that exceeds the real disk size. Use the appropriate flags to get the real status.
Moreover, pay attention when working with file handling, compressing and archiving tools, like cp, tar, zip, and others. For instance, cp has an option that specifies how the sparse files should be handled.

2. Having fun with atop
It’s not a spelling error, there’s no space missing between the letter a and top. atop is a top utility, with some spice. The full description is AT Computing’s System & Process Monitor, an interactive utility to view the load on a Linux system. It can do everything top does, and then some.
atop is a very useful program and you’ll fall in love instantly. The main view is very similar to the original tool, except you have more info and it’s arranged in a more intuitive fashion. You’ll also have color readings for critical percentage of resource usage.

In the bottom half of the main view, you will be able to sort the process table based on different columns, like memory or disk. Press m to sort by memory in the descending order. Press d to sort by disk activity in the descending order.


You can save data into flat files, any which way you want.

Better yet, you can also write data to logs in compressed, binary form and then parse relevant fields, compiling useful time-dependent statistics about your system load and usage, helping identify bottlenecks and problems. The manual page is very details and provides examples to get you started instantly.
For instance, the following command:
atop -w /tmp/atop.raw 30 10
will collect the raw data every thirty seconds a total of ten times. Very similar to iostat and vmstat, as we’ve seen the last time. Afterwards, you can pull out desired subsets very easily.
For example, to view the processor and disk utilization of this file in parseable format:
atop -PCPU,DSK -r /tmp/atop.raw
Here’s what the data looks like:

Now, if you don’t like the separator, just remove it with some simple sed-ing.
sed -e ‘/^SEP$/d’ /tmp/atop.raw > /tmp/f-clean.csv
Then, you can open this file in, say OpenOffice and create some impressive graphs:


3. ASCII art
ASCII art won’t make you an expert, but it can be fun. Oh, I’m not talking about using high-end tools like GIMP; anyone can do that. I’m talking about deriving fun ASCII art from the command line.
There are several ways you can achieve this, we will see two.
boxes
boxes is a neat little utility that lets you create your own command-line fortune cookies, similar to what Linux Mint does. The tool has a number of template ASCII figures available, on top of which you add your own little slogans.
boxes is available in most repositories, so go grab it. Then, start playing. For example, to have a cute little kitten write something witty in your terminal, run boxes -d cat, type your own message and hit Ctrl + D to end. Soon thereafter, a little cat will show in the terminal, along with your own message.

Innocent, sweet and fun.
jp2a
This ominous sounding command is not one of those robots in Star Wars. It’s a utility that can convert JPEG images, any one you want, into ASCII art. Very useful and impressive.
For example, take your stock Tux. Now, the image I found was in the PNG format and jp2a does not handle these. So I had to convert the image to JPEG first.

And then, just run the command against the image name and Voila! Tux is your uncle!

4. xargs
xargs sounds like a peon curse from Warcraft I-III, but it’s in fact a very powerful and useful command that builds and executes commands from the standard input. In other words, when you use complex chains of commands in Linux, sometimes separated by the pipe symbol (|), you may want to feed the output of the last command into the input of the next one. But things can get complicated.
Luckily, xargs can do everything you need. Let’s see a few simple examples.
Example 1:
We will display all the users listed in the /etc/passwd file. Then, we will sort them and print them to the console, each on a separate line.
The command we need is:
cut -d: -f1 < /etc/passwd | sort | xargs echo |
tr ‘ ‘ ‘\n’

xargs takes the list of usernames, one by one, echoes them to the console, while the tr command separates into each line, replacing the space delimiter with a new line feed.
Example 2:
Here’s another example. xargs is particularly useful when run with the find command and quite often sed. Let’s say you want to find a list of certain files in your directory and then manipulate them, including changing their permissions, deleting them or just listing them.
With xargs, you can make this affair a one-liner.
find . -type f -print0 | xargs -0 ls

Here we’re using xargs with the -0 flag, which instructs it to ignore whitespaces and treat slashes and backslashes literally, making it quite useful if you expect your files to contain quotes, spaces and other exotic characters. To do this, xargs requires the find command to provide input in the right format, which is exactly what the -print0 flag does.
If you’re not convinced xargs is mighty, try doing a few exercises without it and see if you can manage to get the job done in a single line of shell code.
5. Swapon/swapoff
Another allegory, Karate Kid. Wax on, wax off. Except that we’re dealing with the command that handles swap files on Linux. I do not know how often you will have to handle swap manually, but if you’re using live CDs or work with RAID, then you just might.
swapon/swapoff allows you to turn on/off swap devices, set their priority and just plain list them. Changing the priority could be useful if you have swaps of different sizes or set on disks with different speeds.
For example, to view all swap devices:
swapon -s
A screenshot of a typical output:

And sometimes, you just may want to turn swap off. For example, swap may be used by the live CD, preventing you from unmounting the disk for partitioning, which could lead to errors. In this case, a simple swapoff will do the trick.
Speaking of disks and speeds …
6. Use ramdisk for lightning-fast execution
RAM is not cheap and you should not waste it as simple storage space if you need not to, but sometimes, just sometimes, you may be in a bit of a hurry and would like to get your project completed as soon as possible. If your work entails quite a bit of disk activity, which is usually the bottleneck of the program execution on modern machines, then using a ramdisk could help.
ramdisk is a file system created in the system memory (RAM) and treated as a regular disk device, hence its name. For all practical purposes, if you give someone a system with a RAM disk, they won’t know the difference, except the speed. ramdisks are much faster.
Here’s a little demo.
First, let’s create a ramdisk (as root or sudo):
sudo mount -t tmpfs none /tmp/ramdisk -o size=50M

We created a 50M disk and mounted it under /tmp/ramdisk. And now, let’s compare some basic writes …
Normal disk:

RAM disk:

Of course, the results will depend on many factors, including system load, disk type and speed, memory type and speed, and whatnot, but even my 23-second demonstration shows that using ramdisk you can boost your performance by 50% of more. And if you attempt repetitive serial tasks like copy, you will be able to improve your execution time by perhaps an order of magnitude.
7. Perl timeout (alarm) function
Again, Perl as the last item. Now, I have to reiterate, I’m not a skilled Perl writer. I am a cunning linguist and a master debater, but my Perl skills are moderate, so don’t take my perling advice as a holy grail. But you should definitely be familiar with the timeout function, or rather – alarm.
Why alarm?
Well, it allows you to gracefully terminate a process with SIGALARM after a given timeout period, without having your program stuck forever, waiting for something to happen.
Now, let’s see an example. If you’ve read my strace article, then this little demo should remind you of some of the things we’ve seen there.
#!/usr/bin/perl
use strict;
my $debug=1;
eval {
local $SIG{ALRM} = sub { die “alarm\n” }; # NB: \n required
alarm 5; # timeout after 5 seconds without response
system(“/bin/ping -c 1 @ARGV[0] > /dev/null”);
alarm 0;
};
if ($@) {
die unless $@ eq “alarm\n”; # propagate unexpected errors
print “\nWe could not ping the desired address!\n\n” if $debug;
# timed out
}
else {
print “\nWe’re good!\n\n” if $debug;
}
What do we have here? Well, a rather simple program. Let’s examine the different bits separately. The first few lines are quite basic. We have the perl declaration, the use of strict coding, which is always recommended, and a debug flag, which will print all kinds of debugging messages when set to true. Rather useful when testing your own stuff.
Next, the eval function, which tells the program to die with ALRM signal if the desired functionality is not achieved within the given time window (in seconds). Our example is a simple ping command, which takes the IP address as the input argument and tries to get a reply within five seconds.
eval {
local $SIG{ALRM} = sub { die “alarm\n” }; # NB: \n required
alarm 5; # timeout after 5 seconds without response
system(“/bin/ping -c 1 @ARGV[0] > /dev/null”);
alarm 0;
};
Next, we set the program to exit if there are error messages ($@), printing a message to the user that informs him/er that we could not ping the desired address. What more, if the program execution got botched for some reason other than our timed alarm, we will terminate the execution, thus covering all angles. If successful, we continue with our work, plus some encouraging messages.
if ($@) {
die unless $@ eq “alarm\n”; # propagate unexpected errors
print “\nWe could not ping the desired address!\n\n” if $debug;
# timed out
}
else {
print “\nWe’re good!\n\n” if $debug;
}
Some screenshots … Here’s the perl code. P.S. Just noticed the 10 seconds in the comment after alert 5; Well, it’s an innocent error, but it does not affect the code, so you can ignore it.

Then, we have a good example:

And a bad one:

And just to show you it’s a five-second timeout we’re talking about, I’ve used the time command to … well, time the execution of the script run:

ping is just a silly example, but you can use other, more complex functions. For example, mount commands. In combination with strace, which we’ve seen a few weeks ago, you can have a powerful trapping mechanism for efficient system debugging.
To read more about alarm, try the official documentation: perldoc -f alarm. To this end, you will need the perl documentation package installed on your system.
Why this exercise?
Well, it emphasizes the importance of proper checks when coding programs that use external inputs and outputs to work. Since you cannot guarantee that the other bits of code will cooperate with yours, you need to place failsafe checks to make sure you can gracefully complete the run without getting stuck. Along with input validation, timeouts and error exits are an integral part of cavalier programming.
Conclusion
That’s it, seven lovelies this time. A magnificent seven. I did promise you sec, but it’s too large to be just a bullet item. We will have a separate article soon, probably as a super-duper admin tool.
Anyhow, today you’ve learned several more useful tools, tricks and commands that should help you understand better your environment, work more smartly and be able to control and monitor your systems more effectively. Best of all, the tips given do not really require any specific platform. Any Linux will do. I used openSUSE 11.2, Ubuntu Jaunty and Ubuntu Karmic for these demos.
I hope you appreciate the combined effort. Stay tuned for more. We’ll have several more compilations as well as dedicated, detailed articles on some of the more powerful programs available, including both mid-end and high-end tools, as well as advanced system debugging utilities.
Welcome to the third installment in the Linux cool hacks series. Like the previous two, this article is all about cool things you can do with your Linux that are not well known and yet rather useful. When I say cool, this applies to laughing hard at XKCD’s sudo make me a sandwich style of people rather than someone wearing Zara flipflops, although those are not mutually exclusive.
Anyhow, we’ve had some 17 tips so far. Let’s try a few more. I will demonstrate using Ubuntu, openSUSE andCentOS, to show you that the choice of the system does not really make much difference. So please join me. Tomorrow, after having read and practiced these tricks, you will be able to impress your significant others and colleagues and there ought to be much rejoicing.
1. Show (kernel) functions in ps output
This is an interesting need. Say you have a program that is misbehaving. You do not want or cannot attach the debugger to it, as you fear you may disrupt some delicate time-race condition or possibly even crash the application. Or it may be stuck in a non-debuggable state. Or it may not have symbols or deny ptrace hooks or who knows what else. All in all, lots of geek lingo, the bottom line is, you just want to know at what stage the execution of the software is stuck, in the quickest, least intrusive way possible. ps will do.
This one specific example is even written in the man page:
ps -eo pid,tid,class,rtprio,ni,pri,psr,pcpu,stat,wchan:14,comm
And you will be able to see in the WCHAN column, the last function being used by your process. Most of the time, this will be completely meaningless, but if you have an inkling of understanding how your process ought to behave or you might be a developer, this could be useful information.

2. Nohup
Nohup is a special Linux command that lets you detach processes from their shell, allowing them to run in what you might want to refer to as the background service mode. Indeed, if you take a look at the process table (ps), you will see a lot of processes that were spawned by the system and run without a tty.
When you start a program from the command line, it will live within the shell of your terminal window, even if you background it with &. When you kill the shell, all of its children processes will die too. In a few select cases, we want to avoid this, so we need a mechanism that will detach processes from their shell. A simple method is to create a startup script and add it to /etc/init.d, but this should really be reserved to services.
So nohup will daemonize our processes – make them daemons. Sounds scary, but it’s just geek lingo designed to impress girls. Anyhow, nohup is invoked against the desired binary or script. You need a full path if the binary or script are not presented in the PATH. You must also background nohup itself, so that it detached from the shell.
nohup <command> &
Nohup will redirect the output to nohup.out in the current directory. You should also make sure to use the proper redirection for the standard input, output and error to avoid hangs.
Here’s an example. Notice that script.sh runs without a terminal, as denoted by ? in the sixth column. For instance, the grep command runs on the virtual terminal pts/3. Moreover, script.sh is parented by init (PID = 1). And you can also see the nohup output, which is just a silly echo in this example.

3. Fallocate
Fallocate sounds a meme, but it is a very neat command that can save you a lot of time. To prove that, let me ask you a question first. What do you do if you need to create a very large file, which cannot be sparse? You use dd and source the bit stream from /dev/zero, but this takes a long time. It’s normally limited by the device speed, which is about 80MB/s for most disks. So if you need to create an 80GB file, you will need some twenty minutes to do that, in the best case. With USB connections and slower disks, this can grow to 40 minutes or longer. fallocate solves the problem by preallocating blocks instantly.
This is a relatively new command and system call in the Linux kernel, available since revision 2.6.23. All right, let us demonstrate.
First, we create a 10MB file. Nothing special. But then, to show you how powerful this command really is, we will compare with dd. While files this small could easily be written to disk cache, masking the true speed, the demonstration is powerful enough without having to use large files.
fallocate -l 10m 10mbfile

Now, the comparison. Notice the actual time differences between fallocate and dd. Even for such a tiny file, the difference is huge. fallocate is some 70 times faster in terms of system time, even though the entire operation took a fraction of the second.


Now, fallocate will remain as fast, without any regard to file size, while dd times will increase. When you have to create files that are several GB is size or much larger, you will appreciate this capability. For example, you may need to create swap files in this manner and preallocate them to partitions during the installation setup. You might not be able to wait long minutes or possibly hours for this operation to complete. Fallocate resolves the problem.
4. Debug filesystems (debugfs)
Debugfs is an interactive tool for managing EXT filesystems. Invoked from the command line, it allows you to change the mode, block size, write to the superblock, force the filesystem to execute specific commands, and more. Naturally, this kind of work means you know what you’re doing and you’re well aware of the potential hazards of data corruption when working against devices and their filesystems in a sort of live operation mode.
debugfs is invoked against the desired target device. By default, it will open the filesystem in read-only mode, as a precaution. This is quite useful for trying to salvage data from corrupted filesystems. Other commands that come into mind when trying to work with filesystems include tune2fs and resize2fs.

5. Blacklisting drivers
The Linux kernel comes with a ton of drivers, some compiled into the kernel, during the kernel compilation, which is done by specifying Y, some available as dynamically loadable modules, which is done by specifying M. The modules will later show under /lib/modules, matching your kernel.
Now, the kernel footprint could be big and contain too many drivers that you do not need or even contain conflicting drivers that interfere with your work. For instance, you might not want ipv6, which is something we tried in my Realtek network troubleshooting on Kubuntu Natty on my latest desktop, or perhaps you might not want the Nouveau graphics driver, as it conflicts with the Nvidia driver and prevents its installation, as we have seen in my CentOS Nvidia guide.
There are several ways you can disable drivers – by blacklisting them. Not a new thing, we’ve done the same back in 2006 with my Linux guide of highly useful configurations. You can make permanent changes by editing files on your system or pass parameters to the kernel commandline in the GRUB menu.
Using the CentOS example, you can disable the Nouveau driver by appending the following string to the kernel command line:
kernel /boot/vmlinuz <all kinds of options> rdblacklist=nouveau
Oncer your system boots and you are 100% confident the change works well, then you can make the change permanent, either by editing the GRUB menu or by editing the driver to the /etc/modprobe.d/blacklist or /etc/modprobe.d/blacklist.conf file, depending on your distribution.
echo “driver name” >> /etc/modprobe.d/blacklist
Please make sure you have backups before you permanently alert your system. Finally, some drivers will have writable parameters exposed under /proc and /sys, allowing you to echo new values on the fly and make changes as necessary. We will discuss that a while later.
6. Browsing the kernel stuff
This is a vague title, but what I’m referring to is the capability to quickly inspect kernel functions, check header files, determine whether your applications are trying to run code that belongs to the kernel or something else and so forth. To this end, there are many tools you can use. We’ll examine a few.
First, you can go online lxr – The Linux Cross Reference site, which indexes all source code in the kernel repositories. So if you’re looking some function, just input the name or part thereof into the search box and start reading.

Then, there’s cscope, which we saw in the Kernel Crash Book. If you have kernel sources installed on your machine, you will be able to check what functions, text strings, symbols and definitions are declared in different source files. This is quite useful if you are trying to debug problems with your applications or perhaps even kernel crashes. To that end, you might also be interested in ctags.

7. Some extras
The tips listed below will probably not serve you that often, but it is good to know about them. Almost like hoarding water for the nuclear winter, so to speak, only more fun. Now, please note that you cannot follow the advice below at all!
It’s a sort of a paradox, but unlike so many people out there, I will not give you blanket suggestions on how to utilize your machines, as every single use case is different. Saying that X will speed Y is utterly and morally wrong. One man’s tweak blessing is another’s curse. Do not even change configuration because someone somewhere said it ought to work, make your system work faster, be more responsive, etc. 99% of these wild and happy recommendations are valid for single home machines with no regard to reality, especially not businesses with heavily loaded production servers. Therefore, be aware of the possibilities, study them carefully and then apply your best formula.
/proc and /sys tunables
Explaining what /proc and /sys do is beyond the scope of this article by three whole quantum leaps. But they are very important pseudo-filesystems that let you tweak all kinds of things, on the fly, no reboot required.
In this section, I will try to elaborate on several useful features, like CPU affinity, memory tunables, scheduling, and a few other items that will normally earn you a good beating your neighbors if you ever speak of them in public. Let’s do it.
For example, if you have a multi-processor system that does very specific tasks, you might want to bypass the internal scheduling mechanisms and force your cores to process only certain workloads. Normally, this tradeoff usually has more problems than benefits, so please don’t make any changes just for the sake of being cool.
To give you a practical example, you might want to assign interrupt handling for most heavily used network channels to CPU1, while allowing the rest of the tasks to work on CPU2. Indeed, if you have a box that has several network devices and churns data like mad, loading one specific processor might be a good idea in ensuring the quality of service for other tasks. Then again, you could ruin everything, so be careful.
To get this going, you need the processor bitmask, which you can derive from the number of available processors on your box, as well as the corresponding interrupt for the channel you wish to assign to a specific processor.
cat /proc/cpuinfo
cat /proc/interrupts

And then, we do the magic – force IRQ 30 (Wireless, iwlagn) to processor 1:
echo 1 > /proc/irq/30/smp_affinity
Of course, your kernel must be capable of symmetric multi-processing, which is a default in all new kernels. It’s not a given for older kernels like 2.6.16 and 2.6.18 in previous but still much used enterprise editions of SUSE and RedHat.
More reading here: http://www.cs.uwaterloo.ca/~brecht/servers/apic/SMP-affinity.txt.
Memory management
Linux memory management is the blackest of magics in the world. But it’s a fun thing, especially if you know what you’re doing. Like I mentioned before, no one setting will work for everyone. There’s no golden rule. The system defaults are as good as empirically possible for the widest range of uses, so you should stick with that.
If however, you feel really adventurous, you might want to explore the kernel tunables under /proc/sys/vm. There are several of those.
The swappiness parameter tells you how aggressively your system will try to swap pages. The values range from 0 to 100. In most cases, your disk will always be the bottleneck, so it will make little difference. Then, there’s the dirty_ratio tunable, which tells the percentage of total system memory that can be taken by dirty pages. Once this limit is hit, the system will start flushing data to the disk. Another parameter that is closely related to the dirty_ratio is dirty_expire_centisecs, which determines the max. age of dirty pages before they are flushed. The system will commit the dirty data based on the first of the two parameters to be met, which will most likely be the expire time.

A mental exercise: the default dirty_ratio on Linux is 40%, while the default expire tunable is set to 3000 centiseconds. A centisecond is 1/100 of a second or 10ms, so we have 30 seconds total. If you have a machine with 4GB RAM, then 1.6GB will be dedicated to dirty pages at most. Now, this means that whatever you’re writing, it needs to create some 55MB of data every second to exceed this threshold in the thirty-second period for the kernel flushing thread to wake and start writing to the disk. In most cases, you will rarely have such aggressive writes. Some notable examples include large copies, video rendering and alike. In daily use, hardly ever. If you have more than 4GB RAM, say 8-16GB, then this becomes even less likely.
This exercise also tells you whether you really need that high dirty_ratio, how to set the other tunables and more. Having too many dirty pages also means very long and sustained writes when the time comes to commit them to disk. Food for thought, fellas. There’s no golden rule.
As you can see, I’m breezing through these extremely lengthy and complex topics, but the idea is not to write a PhD on memory management, but give you a very brief sampling of the possibilities, so you can later explore and use them.
You can make changes by echoing values to /proc or using sysctl.
A very geeky read (direct link) for RHEL4, but still very much relevant today.
Another thing you may want to attempt is to allow/disallow memory overcommitment. Normally, Linux uses smart heuristics for managing overcommittment, but if you are really worried about how your system handles out its quiche to processes, then you can disable the overcommittment or set a ratio. I would recommend against any changes, unless you have very strict requirements, you cannot afford OOM mechanism to work, etc.
I/O scheduling
Another geeky item, best left alone. But if you must, please read on. First of all, most I/O elevator algorithms assume platter-based disks, so if you’re running with SSD, the rules of the game changes, but this has been taken into account in recent kernels. Assuming you’re running on plain old mechanical hardware, then you have one simple goal: as few seeks as possible to minimize access times and wear, which translate into user responsiveness latency. But then, some of your machines might be running pure computation tasks, so the responsiveness might not be an issue.
But in general, we want to perform write operations in bursts, as much data as possible. There are four available schedulers: noop – most basic, dispatches requests as they come, normally good for disks on key and systems with heavy CPU usage; anticipatory – longer delays, so there’s more chance for starvation, however it tries to maximize throughput and reduce seeks; cfq – better known as completely fair queue scheduler, it relies on processes behavior and can be used with ionice to achieve balanced throughputs. It does not prefer writes or reads; deadline – this one tries to dispatch as quickly as possible, treating tasks as real-time, in order to avoid process starvation.
You can issue the change per disk:
echo <scheduler> > /sys/block/<device>/queue/scheduler
For instance:
echo cfq > /sys/block/sdb/queue/scheduler
All this sounds dandy, but the real challenge is figuring out what your machines are doing and match the behavior accordingly. After you have made the change, you will need to test your results. In the Linux world, you will most commonly find cfq or anticipatory as the default choice.
Of course, if you make changes to the scheduler, then you might also want to tweak the readahead settings, both the readahead max. value and the throughput value, as well as the number of simultaneous I/O requests. The corresponding tunables include nr_requests, read_ahead_kb and inode_readahead_blks. Some of the values will be limited by the filesystem choice. Let me disappoint you and tell you that you will have to work hard to see significant improvements.
Some reading on schedulers: Linux Journal – I/O Schedulers.
Filesystem mount options
Like the disk, we want speed. That’s the basic driver here. So let’s see what kind of options we can use. The most notable focus is on the journaling capabilities of modern filesystems.
This is another black magic, but something you can test with relative safety. Choose any old disk, preferably with a single partition to avoid masking results by typical disk speed bottlenecks. Then, test various mount options. Some of the notable performance boosters so to speak include:
writeback mode – only the metadata is journaled, and the data blocks are written directly to their location on the disk. This preserves the filesystem structure and avoids corruption, but data corruption can occur. For example, if the system crashes after the metadata is journaled but before the data block is written.
ordered mode – metadata journaling is done after the data is written to the disk. In this way, data and filesystem are guaranteed consistent after a recovery.
data mode – both metadata and data are journaled. This mode offers the greatest protection against file system corruption and data loss but can suffer from performance degradation, as all data is written twice (first to the journal, then to the disk).
Some more reading: Anatomy of Linux journaling filesystems.
All right, now that we know what we need, we can simply mount a filesystem with the writeback option. You should test extensively, to make sure things work out find, or at the very least, use this option for filesystems with heavy access but that might not be containing critical data.
mount -o data=writeback /dev/<device> /<mountpoint>
You might also want to consider noatime and nodiratime, but again don’t listen to one geek trying to impress you with words, do your own testing and prove everyone else wrong.
And I guess that would be enough for today. Other items that you might want to look at include slabinfo/slabtop, huge pages and Table Lookaside Buffers (TLB). That’s different from LTB, which stands for Tomato Lettuce and Bacon, a different kind of hack. Some screenshots and we’re done here.


Conclusion
There you go, another lovely set of geekiness. Again, the real value in these hacks is the exposure not the actual application. Be aware of the functionality, study it, and then apply it to your personal or business needs one day. And remember that no two computers and use cases are the same, so blind copy & paste will not work.
That would be all, I guess. You are also welcome to check the first and the second article, as well as the whole series of so-called super-duper admin tools. We will also have an extensive review on the Gnu Debugger (gdb) soon. Stay pretty.
Once article numbers start to run high, people tend to start paying less attention to the content. However, by no means does that make this article any less useful or interesting. I happen to have a fresh new bunch of tips and tricks that ought to increase your Linux street credit.
In the first two parts, we focused on system administration mostly. The third part focused on system internals. This fourth chapter will elaborate on compilation and fiddling with Linux binaries, specifically the ELF format. Again, not everyone’s lunch or dinner, but some of you may appreciate the extra geekiness I devoted to making your lives easier. So please follow me.

1. Learn more about the file – no strings attached
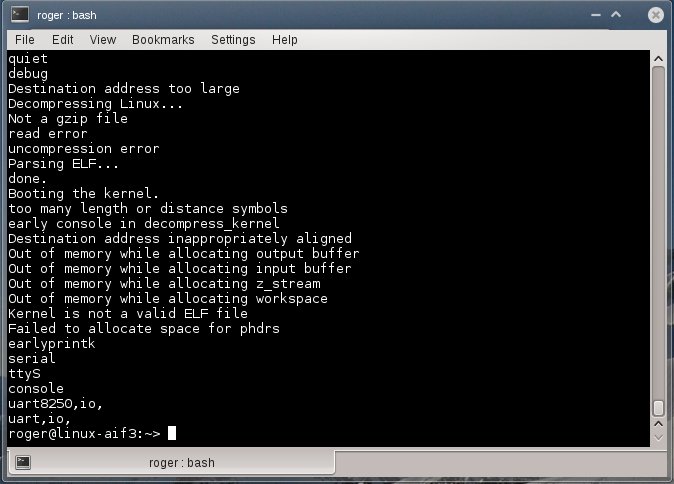
Say you have a binary of some sort – a utility, a shared object, a kernel module, maybe even an entire kernel. Now, using file will give some very basic information on what kind of object you’re dealing with. But there’s more. Strings. Now, the subtitle makes a lot of punny sense, hihihihihihi.
Strings is a very useful command that can pull out all printable characters out of binary files. This can be quite useful if you need to know the would-be meta data, like compiler versions, compilation options, author, etc. For example, here’s what it looks like for a kernel vmlinuz file. Some of you may actually recognize some of the print messages there.
2. Debugging symbols
Now, say you wish to debug your faulty application, but for some reason all of the functions in the backtrace come out with ?? marks. The simple reason is that you may not have debug symbols installed. But how would you know?
Well, apart from checking the installed database of RPM of DEB files, you may want to query the files directly. Again, we will use the file command, and then delve deeper into the system. Here’s an example:

What we see here is that we have a 32-bit Little Endian shared object for the Intel architecture, stripped of symbols. That’s what the last word tell us. This means the binary was compiled without symbols or they have been removed afterward to conserve space and improve performance. We discussed symbols in the Kernel Crash book, too.
So how do you go about having or not having debug symbols? Another highly useful tool that should let you get binary symbols is nm. This tool is specifically designed to get symbols from various sections in the executable file format that is typical on Linux.
For instance, -b flag lets you get symbols for uninitialized global variables in the data section, also known as bss. -C lets you query common symbols, or rather uninitialized data. In our example, there are none available, because our shared library is stripped.

However, if you query with -D flag, you will get symbols in the initialized data section.

For most people, this information is completely useless. But for senior system admins and software developers, knowing exactly the mapping of code in a binary and translation of memory addresses to function names is essential.
Playing with symbols – objdump, objcopy, readelf
We can add and remove them, as we please, after the compilation. To that end, we will use several handy utilities, including objcopy and readelf. The first allows manipulating object files. The second lets you read data from binary files in a structured human readable format.
We will begin with readelf. The simplest way is to dump everything. This can be done using -a flag, but beware the torrents of information, which probably won’t mean much to anyone but developers and hackers. Still good to know and impress girls.

Another useful flag is –debug-dump=info. You might be interested in debuginfo only. Here, specifically, we compile our test tool with debug symbols, and then display the info. Please note that we have a lot of information here:

Now, objcopy can manipulate files so that above information is shown, not shown or used elsewhere. For instance, you might want to compile a binary with debug symbols for testing purposes, but distribute a stripped version to your customers. Let’s see a few practical use cases.
To remove debug info from the original binary:
objcopy –strip-debug foo
This will result in a stripped binary, just like we saw earlier. But then, you might not want to toss away those symbols permanently. To that end, you can extract debug info and keep it into separate file:
objcopy –only-keep-debug foo foo.dbg
And then, you can link debug info back to the stripped binary when you need it:
objcopy –add-gnu-debuglink=foo.dbg foo
On the far end of the spectrum, we get objdump, another handy utility. Again, we used the program before, when playing with kernel crashes, so we are no strangers to its power and functionality. Similar to readelf, objdump let us obtain information from object files. For example, you may be interested in the comment section of your binary:

Or you may want everything:

Combined example
Now, let’s see this in practice. First, we compile our code with -g flag. The binary weighs some 18299 bytes. Then, we strip debug information using objcopy. The resulting binary is now much smaller, at 13042 bytes. And readelf shows nothing, unlike before.

3. Compilation optimization tips
When compiling your code, there are a billion flags you can use to make you code more efficient, leaner, more compact, easier to debug, or something else entirely. What I want to focus on here is the optimization during the compilation. GCC, which can be considered a de-facto compiler on pretty much any Linux, has the ability to optimize your code. Quoting from the original website:
Without any optimization option, the compiler’s goal is to reduce the cost of compilation and to make debugging produce the expected results. Statements are independent; if you stop the program with a breakpoint, you can then assign a new value to any variable or change the program counter to any other statement in the function and get exactly the results you would expect from the source code. Turning on optimization flags makes the compiler attempt to improve the performance and/or code size at the expense of compilation time and possibly the ability to debug the program.
In other words, the compiler can perform optimizations based on the knowledge it has of the program. This is done by intermixing your C language with Assembly in numerous ways. For example, simple arithmetic procedures of constant values can be skipped altogether and the final results returned, saving time.
Optimizations can affect binary file size and its speed or both. At the same time, it will be much harder to debug, because some of the instructions may be omitted. Moreover, the compilation time will probably be longer. Overall, -O2 levels offers a good compromise between user’s ability to debug, size and performance. It is also possible to recompile code with -O0 level for debugging purposes only and ship to customers with the lean image.

Here’s another interesting article on optimizations.
4. LDD (List Dynamic Dependencies)
When you try to run your applications, they may sometimes refuse to start, complaining about missing libraries. This can happen for several reasons, including permissions, badly configured path or an actual missing library. To be to know exactly what’s going on, there’s a neat little utility called LDD. It allows you to print shared library dependencies for your binaries. You should use it.

LD_PRELOAD and LD_LIBRARY_PATH
As I’ve mentioned just moments earlier, the system path can impact the successful startup of applications. For example, you may have several libraries under /opt, but /opt is not defined in the search path, which may only include /lib and /lib64, for instance. When you try to fire up your program, it will fail, not having found the libraries, even though they are physically there. You can work around this issue without copying files around by initializing environment variables that will tell the system where to look.
The word system sounds almighty here, so perhaps a short introduction in how things work might be in order. In Linux, there’s the super-tool called dynamic linker/loader, which does the task of finding and loading libraries for programs to run. ld.so is a smart and efficient tool, so it does not perform a full-system search every time it needs to fire up a binary. Instead, it has its own mini-database, stored under /etc/ld.so.cache, which contains a compiled list of search libraries and an ordered list of candidate libraries. It’s somewhat similar to the locate program.
This list is updated by running ldconfig, which most Linux systems execute either during startup or shutdown, but it can be manually run whenever the /etc/ld.so.conf file, which contains the list of search libraries, is updated. This also happens after installations of software.
If the linker cannot find libraries, the loading of the program will fail. And you can use LDD to see exactly what gives. Then, you can use the environment variables LD_PRELOAD and LD_LIBRARY_PATH to force loading of libraries outside the search path.
There is some difference between the two. LD_PRELOAD will force loading of these libraries before any other. LD_LIBRARY_PATH is similar to standard PATH. There are many other variables you can change, but that’s what the man page is for.
One last hack that you might be interested in is rpath. It allows hard-coding runtime search paths directly into the executable, which might be necessary if you’re using several versions of the same shared library, for instance.
Recursive implementation
LDD displays only unique values. But you might be interested in a recursive implementation. To that end, you might want to check the Recursive LDD tool, available for download at Sourceforge.net. It’s a simple Perl script, with some nice tweaks and options. Quite useful for debugging software problems.

5. Some more gdb tips
We learned a lot about gdb. Now, let’s learn some more. Specifically, I want to talk to you about the Text User Interface (TUI) functionality. What you want to do is fire up the venerable debugger with -tui option. Then, you will have a sort of a split-screen view of both your code and the gdb prompt, allowing you to debug with higher visual clarity. All the usual tricks still apply.

You might also be interested in this article.
6. Other tips
The one last extra tip is about translating addresses into file names and line numbers. addr2line translates addresses into file names and line numbers. Given an address in an executable or an offset in a section of a relocatable object, it uses the debugging information to figure out which file name and line number are associated with it.
addr2line <addr> -e <executable>
A geeky example; say you have a misbehaving program. And then you run it under a debugger and get a backtrace. Now, let’s assume we have a problematic frame:
# C [libz.so.1+0xa910] gzdirect+0x28
All right, so we translate (-e tells us the name of the object). Works both ways. You can translate from offsets to functions and line numbers and vice versa. Again, this can be quite handy for debugging, but you must be familiar with the application and its source.
addr2line 0xa910 -e libz.so.1
/tmp/zlib/zlib-1.2.5/gzread.c:614
addr2line -f -e libz.so.1.2.5 0xa910
gzdirect ? function name
/tmp/zlib/zlib-1.2.5/gzread.c:614
More reading
You might also want to check these:
Linux super-duper admin tools: strace and lsof
Linux system debugging super tutorial
Highly useful Linux commands & configurations
Conclusion
I assume this article is only for the brave, bold and beautiful. It’s definitely not something the absolute majority of you will ever want, need, see, try, require, or anything of that sort. But then, if you’re after impressing girls, there’s no better way of doing it.
Along that noble cause, this tutorial also presents some handy tips for software development and debugging, which, combined with a deep understanding of system internals and wise use of tools like strace, lsof, gdb, and others, can provide an awesome wealth of useful information. We learned how to read and extract information from files, how to work with symbols, how to read the binary format, compilation tips, dynamic dependencies, and several other tweaks and hacks. That should keep you busy for a week or there until you figure out everything. Meanwhile, do send me any ideas you may have on similar topics, if you feel there ought to be a tutorial out there. And see you around.


